SewMona

A slice of my Florida life

  • Sewing
    • SewMona on Etsy
    • Clothes
      • Boys
      • Girls
      • Men
      • Women
    • Pattern Reviews
    • How to Sew
  • Camping
    • Florida Campgrounds
  • Recipes
  • Crafts
  • DIY
  • About

Upcycling a T-Shirt and Color Blocking a Dolman

Finished Dolman Upcycle Color Block

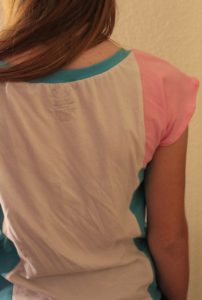
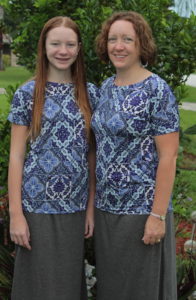
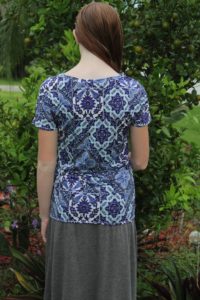
My daughter got this shirt for her birthday year or two ago and loved it!  However, it has recently gotten a little tight and she was sad about the thought of it going to the rummage sale.

Original too small shirt to be upcycled

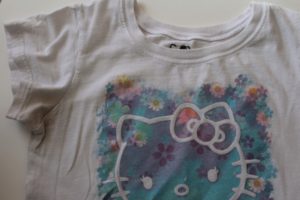
I told her I might be able to upcycle it into a “new” shirt.  She was agreeable and I decided that a dolman was my best option (OK, actually I was going to do a raglan, but I would’ve had to reprint the pattern…foster kittens got to it….the dolman pattern was all printed and ready to go).  The first step is to cut the sleeves off (and throw them away!) and cut the side seams and shoulder seams.  I cut as close to the seams as possible.  You should end up with a front piece and a back piece.

First cut off the sleeves, upcycle

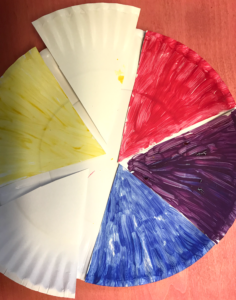
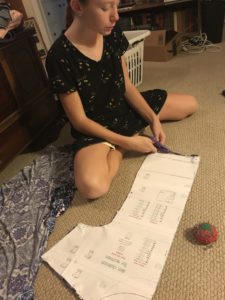
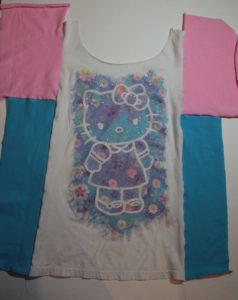
To make the dolman work, I would have to color block.  Color blocking is not my strong suit!  I have a hard time seeing what the finished thing will look like.  I tried laying out the fabric on the pattern so I could get an idea of what it would look like.

Laying Out color blocking

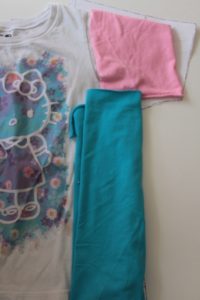
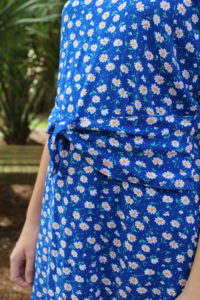
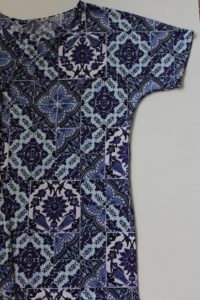
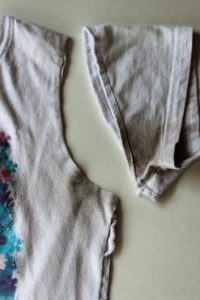
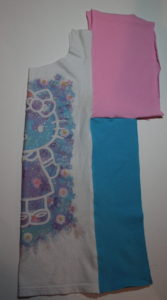
While doing this, I realized that I needed to straighten out the sides to the shirt and the arm cutouts to make it more like a panel, so I trimmed it down some.  Once I was happy with they way it looked, I sewed my pieces together.  First I sewed a pink rectangle to a blue rectangle.  I also hemmed the bottom of the blue since I was keeping the original t-shirt hem.  Then I sewed it to the newly straightened out sides of the the old t-shirt.  I also decided I was going to need to redo the neckline, so I cut the neckband off.

T-Shirt Color Blocked

Then, I folded my piece of fabric in half and put it on the pattern and trimmed it to fit.

Attach the color blocking

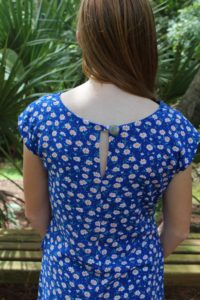
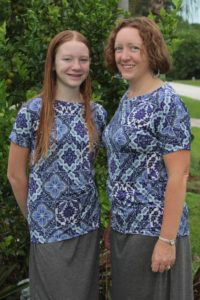
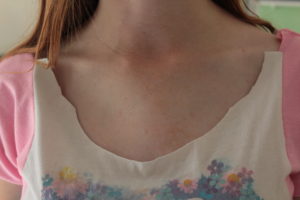
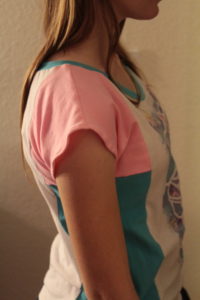
Then, I sewed the side seams.  At this point, I was really worried about the neckline.  It looked really wide for my very modest teen!  I was hopeful that the new neckband would pull it in!

Dolman upcycled t-shirt

I had her try it on and I was still worried.  It just seemed overly big!

Dolman neckline too big, upcycled t-shirt, color blocking

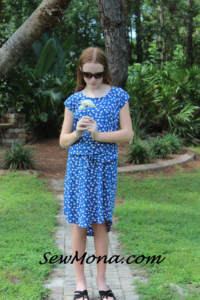
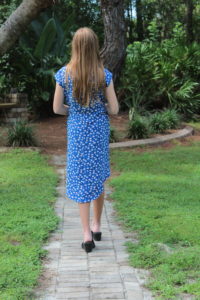
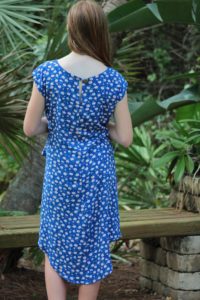
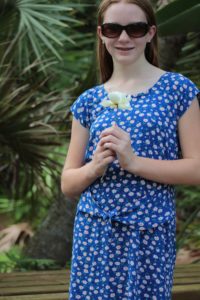
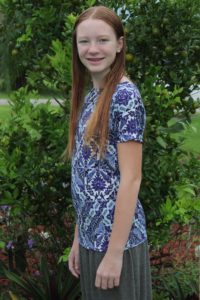
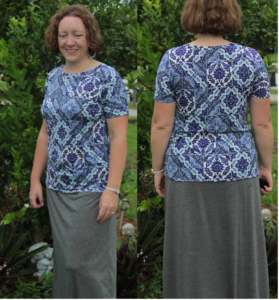
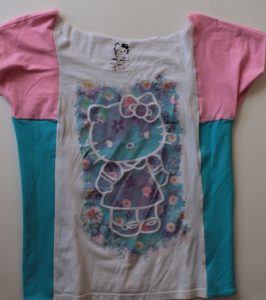
I figured at this point, I might as well finish it. All I had left was the neckband and hemming the sleeves.  I’m actually pretty happy with the way it turned out!

Finished upcycled color blocked dolman

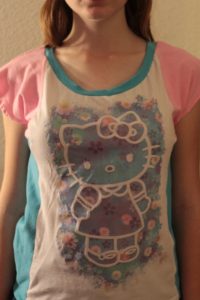
I probably could’ve made the neckband smaller, but it works as is too.

Side view finished color blocked upcycled dolman

Do you upcycle your kids clothes?  Do you color block?

Back finished upcycled color blocking dolman

Art: Making a Color Wheel

Making A Color Wheel SewMona.com

Part of my “real job” is teaching art to K-8th grade.  We started off the year with a simple color wheel – not much creativity required, but they seemed to enjoy the finger painting.  All you need are some tempera paints (preferably washable!), glue, paper plates, some wet paper towels (for cleaning fingers between colors), and a piece of foil.

Primary Colors for Color Wheel

For each kid, you will need two paper plates.  Cut one of them into six pieces.  The other one will be for assembling the color wheel.

Cut a paper plate into 6 pieces.

For the younger kids (K-2), I made it super easy for them.  I put the required paint on each piece – red, blue, yellow, and then red/yellow, red/blue, and blue/yellow.  All they had to do was spread the paint for the primary colors and mix the paint right on the piece for the secondary colors.  For grades 3-5, I put the paint on a piece of foil so they had to do all the work.  I did have to explain that they couldn’t get the colors mixed on the foil – they needed to keep the colors pure and mix them on the pieces.

Put the paint on a piece of foil for mixing.

As they painted the pieces, I explained how the primary colors mix to make the secondary colors and showed them how to put them in order on their color wheel.

Paint the color wheel.

After the pieces dry, glue them to the other plate.

The finished color wheel

To make this a little more challenging for the 6-8 graders, I cut the plates into 12 pieces.  After they painted the primary and secondary colors, I had them mix a primary with a secondary – so mix red with orange to make red-orange, mix yellow with orange to make yellow-orange, mix blue with purple to make blue-purple, etc (blue-green, red-purple, and yellow-green).  These colors are called intermediate colors or tertiary colors.  They may need some help getting them all arranged on the paper plate.  I tried to make sure they placed each piece as they painted it.  It can be hard to tell the secondary and tertiary colors apart.

Color Wheel with 12 pie pieces.


This lesson is based on the Rainbow Pie lesson.

Sewing Books and Patterns

 Sewing Books and Patterns
*This post contain affiliate links.

If you follow me on Instagram, then you know I recently discovered sewing books.  I don’t know why it never occurred to me to look for sewing books, but….  I’ve read four so far (having a real job really cuts into my reading time!).  I’m including the Amazon links to my favorite three books, but I found them at my local library in the non fiction section in the 646 section.  Make sure to see what other books are there – I need to remember to check out that section at one of my local libraries (I have two close to me).

So far, my three favorite sewing books are The Magic Pattern by Amy Barickman, Make Your Own Patterns by Rene Bergh, and The Sewing Bible by Ruth Singer.  All three of these books teach you about sewing and patterns and then have some projects for you to try.

Make Your Own Patterns 

This book details how to design and/or alter patterns that are custom fit for you (or your spouse or your child or whomever you choose).  If you are interested in designing your own patterns or altering existing ones, this is the book for you.  It includes all the measurements you need to draft or modify a well fitting pattern.  Bodices, necklines, sleeves, blouses/tops, jackets, skirts, dresses, and trousers are all covered.  There are also basic quarter size patterns that you can enlarge and then customize to your size and style using either their ideas or your own.


The Magic Pattern

This book comes with a CD with the patterns from the book.  The idea of making six different items from one pattern is intriguing.  In theory, you could make an entire wardrobe with just these patterns (and the book gives you suggestions for taking the patterns from one season to the next).  The six patterns are a tank top, skirt, dress, cardigan, coat, and accessory (hat).  Add your favorite pair of shorts, jeans, and/or leggings and you’re all set.  I did find the list of tools you will need to get started to be a little bit excessive.  My list of sewing tools you need to get started includes only the basics.  I do like the description of different kinds of fabric you can use.  Printing these patterns is very much like PDF patterns that you can buy – print the pattern, measure the test square, and then fit the pieces together.  There is good information on adjusting the pattern and finishing techniques.


The Sewing Bible

This book has so much information about all kinds of sewing techniques!  You can learn about hand sewing and machine sewing in this book.  There are so many hand sewing stitches.  Several that I’ve never heard of and did you know you can sew buttonholes by hand?  Yikes!  Might be OK for just one, but I can’t imagine trying to make several all look the same!  Plus, I’ve made friends with my button hole maker on my sewing machine.  You can learn quilting basics, different seam types, different ways to install a zipper as well as other fasteners.  There are so many different kinds of seams!  You can learn about shirring and smocking.  After you’ve learned the practical and decorative techniques, there are projects you can do.  This book is a great reference guide for both beginners and advanced sewers (sew-ers).

What’s your favorite sewing book?

*This post contains affiliate links.  See my disclosure policy for more details.

Pattern Review – Bitty Brunch Blouse by Patterns for Pirates

 *This post contains affiliate links.

I recently got to test the Bitty Brunch Blouse by Patterns for Pirates.  This is a woven dolman style top with options galore!  Since I normally sew with knits, this was a good chance for me to use some of my woven fabric.  It’s perfect for any drapey wovens.

Patterns for Pirates Bitty Brunch Blouse

I made the dress length option.  The hem is knee length in front and just below knee length in the back.  You can also make it shirt length with either a straight hem or more of a tunic length with a curved hem.

Bitty Brunch Blouse by Patterns for Pirates full back

It has a simple button closure on the back.  No button holes – it’s a simple tab close button.  You can also do a henley placket if you prefer the opening in the front.

Bitty Brunch Blouse by Patterns for Pirate Back Button

I love the hi-low hems and have made several things for DD with this hem like the Patterns for Pirates Fav Tee.

Bitty Brunch Blouse by Patterns for Pirates dress length curved hem

Waist ties to cinch it in a little – can be tied in the front or back or you can leave them off completely.

Bitty Brunch Blouse by Patterns for Pirates Waist Ties

I opted for the traditional dolman sleeves – simple cap style.  There’s also an option for a tank top with wider shoulders and a cuffed dolman sleeve with a button tab.

Bitty Brunch Blouse by Patterns for Pirates full back

I didn’t put any pockets on this dress (normally I’m all about the pockets!), but there is an option for a chest pocket.

Bitty Brunch Blouse by Patterns for Pirates full front


Get the Bitty Brunch Blouse or the women’s Brunch Blouse for $9 each or buy the bundle for $17.

*This post contains affiliate links.  See my disclosure policy for more details.

How To Sew – Making A Dolman Plus Get A Free Pattern

*This post contains affiliate links.

MotherDaughterDolmans

I was so excited because I really wanted to do a dolman style shirt for the next easy pattern and I recently discovered a free one!  You have to join the Facebook group to get the code for it.   The wide range of sizes (00-26) is another reason I like this pattern – I can make shirts for my daughter and me from the same pattern.  She’s a teenager and sometimes she fits kids sizes and sometimes she doesn’t.

Dolman Slim Fit

Dolmans are really easy because there are no sleeves to sew in since they are part of the body (although there are options to add long sleeves to it).  Two seams, a neck band, sleeve hems, and the bottom hem.  This pattern is also for knits so you’ll need a ball point needle.  Either a size 14 or 11 (The thinner the material the smaller needle number).

Halla Slim Fit Dolman

I decided to have my daughter make one of these with me – just to show how easy it is.  Her least favorite part is pinning and cutting and yes, we’re on the floor…not ideal, but it works in a pinch.

Learning to cut out a pattern

Just to keep things real – she didn’t actually get to sew her shirt.  My machine was giving her fits – skipping stitches.  It turned out that I was using the wrong size needle and then the needle was bent just the slightest bit.  By the time I realized that, she was done.  Since I don’t want to force her to sew, I finished up her shirt.

Even though this pattern is free, there are still options!  Don’t like the slim fit?  You can make it less fitted.  Want bat wing style sleeves?  You can do that too.  The best part is, these are techniques that you can use to alter other patterns you have.  There are two neckline options.  For my daughter, I did the higher neckline and for mine, I went with the lower neckline – still perfectly modest, just not as high.  I tried on the shirt before I put the neckband on and was concerned that the neck was going to be too big.  Never fear, once the neckband was on, it fit perfectly!

Halla Slim Fit Dolman Front and Back

The dolman pairs perfectly with the Chloe maxi skirt (also free and super easy) from Made for Mermaids (which is what we’re wearing in our matching pictures).  I’m sure that at some point in the future, my teenager won’t want to match me, but for now she loves it.

Halla Slim Fit Dolman and Made for Mermaids Chloe

The Hallå Slim Fit Dolman is available for women in sizes 00-26.  Join their facebook group to get the code to get it free (read the pinned post).


Another option for a dolman pattern is the Sun Kissed Tee dolman by Peek-a-Boo Pattern Shop.  It is NOT free, however she does have sales on occasion.  It’s a simple no frills pattern, but there’s an option to add ruching to the sides which is why I love the pattern!  I think the ruching adds a nice touch and it’s really not that hard.  There are others with more sleeve and hem options, but for beginners, I really like these two.

Dolman shirt with ruched sides.

*This post contains affiliate links.  See my disclosure policy for more details.
  • « Previous Page
  • 1
  • …
  • 7
  • 8
  • 9
  • 10
  • 11
  • …
  • 43
  • Next Page »

Hi, I'm Mona - wife, mom, teacher, seamstress, blogger. This is my home on the web. Read More…

Categories

Copyright © 2026 · The Marianne Theme By Blogelina · Built on the Genesis Framework

Copyright © 2026 · The Marianne on Genesis Framework · WordPress · Log in