SewMona

A slice of my Florida life

  • Sewing
    • SewMona on Etsy
    • Clothes
      • Boys
      • Girls
      • Men
      • Women
    • Pattern Reviews
    • How to Sew
  • Camping
    • Florida Campgrounds
  • Recipes
  • Crafts
  • DIY
  • About

Take In A Simple Skirt

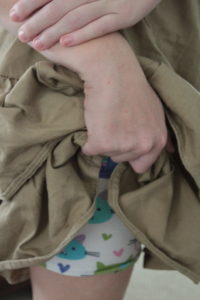
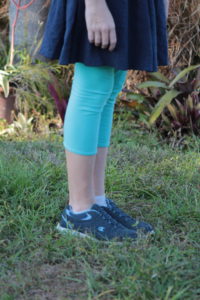
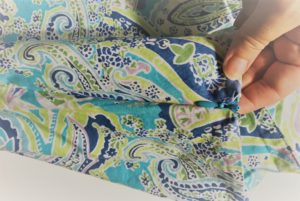
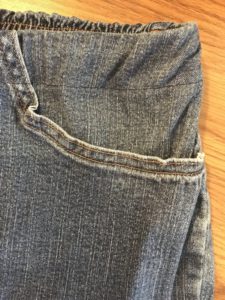
I got this skirt in a bag of hand-me-downs.  I love the print and the style, but it was a little too big.  I looked at the waist and realized it would be so simple to take the waist/hips in a bit.  There’s a zipper on the side that I absolutely do not want to mess with!  I also don’t want to do anything to the hem.  So, all my adjustments will taper out before I get to the hem.

Side invisible zipper that I'm not touching!

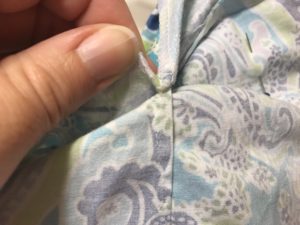
Before I could take anything in, I needed to undo the stitching holding the facing down.  Fortunately this was easy since they just did a couple little stitches at each seam.

Undo the stitching tacking the facing down.

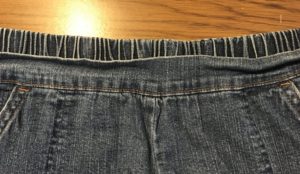
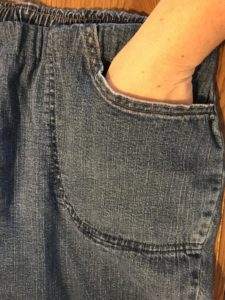
The easiest adjustment is to the back.  There’s a seam down the center back that I can very easily take in.  I tried on the skirt and clipped it where I want my back seam.  Pin it and make sure to taper it in gradually so that you don’t need to mess with the hem.  Sew it and try it on to make sure it fits.  Then trim (and serge if you want) the excess from the seam.

Pin the back seam tapering it in towards the bottom.

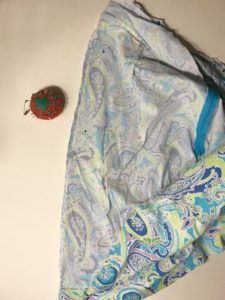
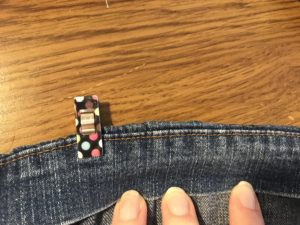
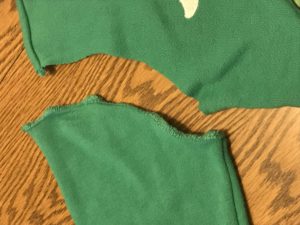
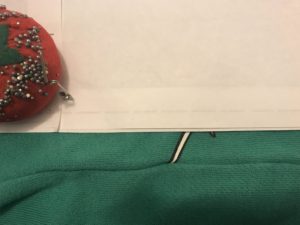
To help balance out the amount I took in at the back (so the side seams aren’t noticeably towards the back), I also took in the front darts a little bit.  I only took each dart in about 1/2″ (green line in photo below).  After I tried it on again, I trimmed (and serge) the darts to help them lay flatter.  Otherwise you end up with a really thick spot in the waistband which can be hard to make lay flat.

Take in the front darts.


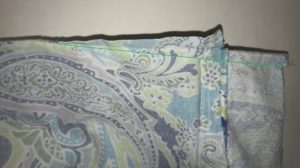
The final step is the tack the facing back down again.  Just a couple quick stitches on the side and back seams plus the front darts and it’s secured.  Iron the facing and darts to flatten out the new seams and you are good to go!

Finished taking in the skirt

Shortening the Rise on Elastic Waist Shorts

FixingDroopyDrawers

Ever buy a pair of shorts (or pants, but I’m in Florida and basically live in shorts) and the rise is just too long?  You feel like you’ve got them pulled up to your chest just to have them not look like droopy drawers.  Most annoying!  With kids, you can roll the waistband down, and chances are as they grow, they’ll grow into them and you won’t have to roll it anymore.  However, as an adult, you probably aren’t going to grow into your shorts (or at least I hope not!)  As long as they don’t have a functional fly, it’s actually very easy to fix!

First, I iron the waistband to get rid of the wrinkles and to make it easier to line up and sew in place.

Jeans shorts that are too long waisted

For kids, you roll the waistband down and to the outside simply because that’s the only way it works.  However, for adults, you want to turn it to the inside so it can be sewn down.  I turn it down on the seam and clip it into place.

Fold the wasitband in and clip it

Then, sew it down by sewing close to the bottom edge.  I usually line up the outside edge of the presser foot with the bottom edge of the waistband.  If you have thread that matches what the manufacturer used (in this case denim yellow) that’s fine, but in my case I went with navy blue so it wouldn’t show.

Sew the waist band down

All sewed and ready to go.  It probably takes 10 minutes tops to do this – quick & easy!

Finished jeans shorts with waistband sewn down

The only thing that might be a problem is the pockets.  You’ll be sewing through them and making the opening about two inches smaller.  It shouldn’t be a problem, but it’s something to think about before you sew the waistband down.

The pocket will be slightly smaller

See – you can still fit your hand easily into the pocket.  It’s not as deep as before either, but it’s still functional and there’s no more droopy drawers!

Even though the pocket opening is smaller, it isn't too small

Upcycling A Sweatshirt

Sweatshirt to Raglan

My son recently found a Ninja Turtles sweatshirt in a bag of hand-me-downs.  It’s too big for him, but he wants to wear it now.

So sad, the Ninja sweatshirt is too big

It’s also long sleeved and we live in SWFL where it’s almost always summer (except for a couple weeks in January where I actually had to turn the heat on…I hate turning the heat on!).

Long sleeves are no good in Florida

Anyway, I found the perfect color of cotton spandex in my recent material order so I can make him a raglan – short sleeves, possibly with a hood.

So happy the shirt can be resized

My first step is always to cut the sleeves off.

Sweatshirt to raglan - cut off the sleeves

Since I don’t want to rehem the shirt, I’m not going to cut the side seams.  This makes laying the pattern pieces out a little tricky, but hopefully it will work out.  The print on the front was slightly off center meaning that when I cut out the new front, I’m going to cut some of this sword off.

Cutting the front piece out is tricky

The front doesn’t look too bad.  I believe the original shirt was a 14/16 and I’m making a 10.  Not a huge change, but even so, the design just fits on the front.

Front piece cut out of old sweatshirt.

I’m always worried that the neckline is going to be too big, but I’ve learned to wait until I have the hood or neck band on…it always looks much better!

Sweatshirt turned raglan

With the hood sewn on, the neckline fits so much better and there’s still some growing room (very important!).

A new raglan upcycled from a sweatshirt.

This kid loves making all different faces while I’m trying to take pictures.  Plus we’ve got a new cat who thinks he needs to try opening all the doors.

A new raglan upcycled from a sweatshirt plus the cat.

Really Mom, you need another picture??

A new raglan upcycled from a sweatshirt.

So, have you ever upcycled a shirt into something new?  If not, you should try it!  It’s really not that hard.

A new raglan upcycled from a sweatshirt.

*affiliate link* The pattern I used here is the Rowan Raglan.  If you buy it through my link, I earn some money (it doesn’t cost you anything extra!  🙂  ).  Read more about affiliate links on my disclosure page.

What to Do With Lemons


We have a lemon tree that produces an abundance of lemons every year.  That would be great except we don’t care for lemons (or homemade lemonade) and even if we did, who can eat bags and bags of them?  I hate to waste them so I’m constantly trying to figure out what to do with them.  I normally give away as many as I can, juice some of them and freeze the juice in ice cube trays to have for baking or lemon water.  After that, I’m lost and my compost heap is well fed.

Lemon Tree
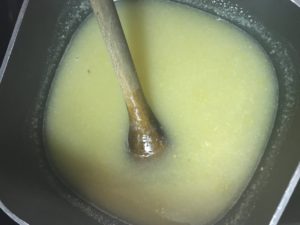
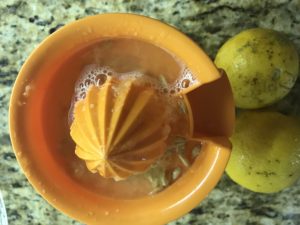
My sister-in-law gave me two great ideas!  One was cookies – while I’m not a fan of lemon flavor, the rest of my family loves it.  SIL found a cookie recipe and made them for us.  They were actually pretty good….so I made a batch and they came out just as good!  There are actually a bunch of recipes on her site that use lemons…I may have to try some of them out too.

Lemon cookies

She also found a recipe for dishwasher soap.  I’ve made homemade laundry soap and use it from time to time (I’ve been finding great deals on my favorite brands at CVS so I haven’t made laundry soap in ages!).  I made dishwasher soap once and it was a flop!  It hardened and was a pain to measure out.  This time, I only made a single batch and I followed the directions carefully.  I’ve been using it for a couple weeks now and it works just as good as the name brand I normally buy. Plus it’s a whole lot cheaper!  I didn’t have to buy anything (I had the coarse salt leftover from last time and the other stuff I had on hand).  I will say that I did NOT strain my mixture.  I don’t have a strainer, so I just blended it really, really well!

Making dish washer soap from lemons

I’ve been juicing lemons and freezing them in egg trays (I think my ice cube trays met with an unfortunate end), I’m going to chop up some lemons for future batches of dish soap, and I’m freezing some lemon peel for the cookies.  I still need more ideas (seriously, we had at least 5 shopping bags full!), but I’m not putting as many lemons in my compost heap this year!

Juicing lemons

Do you like lemons?  Any great ideas for what to do with an over abundance of them?  I really do hate feeding them to my compost.

Lemon Tree

How to Sew – Free Leggings for Kids and Adults

 How To Sew plus a free leggings pattern
*This post contains affiliate links.

I’m not much of a leggings person, but my daughter wears them under her school skirts frequently.  They’re perfect for keeping her modest on the playground and some of her favorite school uniform skirts are the ones that have leggings attached.

Fun leggings under a boring school skirt

Leggings are pretty quick and easy to sew up and there’s nothing better than a free pattern!  Feel free to skip to the end of the post if you just want the links.  Otherwise, read on for my review of the Bonny Leggings.

Bonny Leggings Capri Length

Leggings require material with good recovery – it should have at least 5% spandex/lycra otherwise you’ll have saggy knees and if you do a yoga style waistband, they won’t stay up all day.  Talk about a wardrobe malfunction!

I assemble my leggings differently than the instructions.  I prefer to sew the center front and back seams first.

Sewing the center front and back seams first.

Then I sew the inseams together.

Sewing inseam after center seams.

Then sew the waistband on per the instructions.  The waistband does not need to be stretched to fit – it should fit the opening perfectly.

The bonny leggings pattern comes with directions for making a knit skirt to attach to your leggings.  Once you’ve made a skirt with the leggings and know how to attach the leggings to the skirt, you can use the leggings with your favorite skirt pattern to playground proof your daughter’s wardrobe.  It’s so easy!  Plus, if your school requires a certain color skirt (like navy or tan….boring!), you can add a fun print for the leggings.  No one will know, but it’s a fun way to dress up her school wardrobe.

School Uniform skirt with fun leggings

The kid leggings are available here in sizes 1/2 – 14 – Bonny Leggings.  They are totally free – no facebook groups to join, just add the pattern to your cart and checkout.

The adult leggings are available here (and in full disclosure, I’ve never made them, I’m just pointing them out for adults who may want leggings or for older girls who don’t fit into Bonny’s anymore) – Peg Legs.  Please note there are also a couple add on packs which are also free – a maternity add on and an add on with more options – waistband, color blocking, side pocket.

*This post contains affiliate links.  For more information, see my disclosure policy.
  • « Previous Page
  • 1
  • …
  • 6
  • 7
  • 8
  • 9
  • 10
  • …
  • 43
  • Next Page »

Hi, I'm Mona - wife, mom, teacher, seamstress, blogger. This is my home on the web. Read More…

Categories

Copyright © 2026 · The Marianne Theme By Blogelina · Built on the Genesis Framework

Copyright © 2026 · The Marianne on Genesis Framework · WordPress · Log in