SewMona

A slice of my Florida life

  • Sewing
    • SewMona on Etsy
    • Clothes
      • Boys
      • Girls
      • Men
      • Women
    • Pattern Reviews
    • How to Sew
  • Camping
    • Florida Campgrounds
  • Recipes
  • Crafts
  • DIY
  • About

Pattern Review: Camila Swimsuit by Made for Mermaids Plus Two Simple Hacks

*Some links are affiliate links.

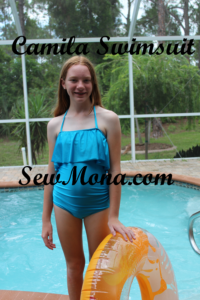
I recently tested the Camila swimsuit by Made for Mermaids.  It was my first venture into girls swimwear.  I’ve made swimsuits for my boys and they’ve worked out really well.

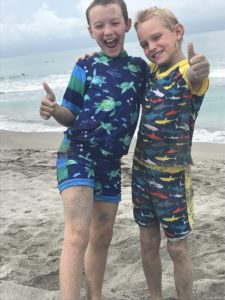
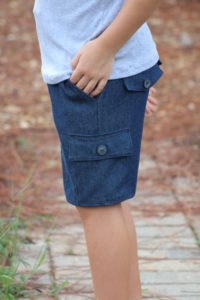
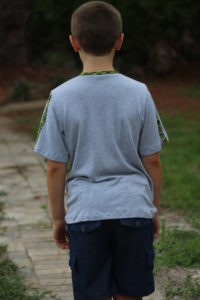
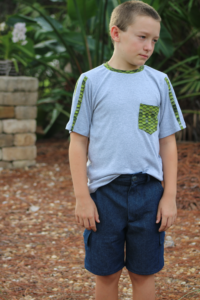
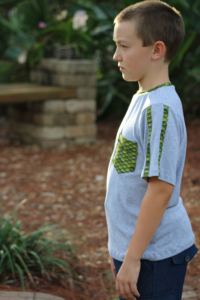
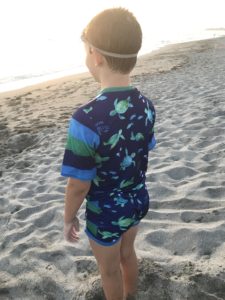
These Monaco swim trunks are so comfy for my boys!  They’re made from swim knit  are so much easier to move in, plus there’s so many more options for fabric!  The shark shirt is one I drafted myself based on a shirt that currently fits.  The turtle shirt is the Boulder Tee by Gracious Threads.

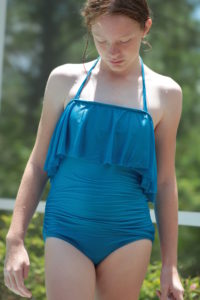
Back to girls swimsuits – I’ve never made one!  I’ve thought about it, but never took the plunge.  The Camila is an easy swimsuit and it comes with a couple options.  For my first one, I did view B (ruffle under the arm) with halter ties.

Camila Swimsuit Ruffle Halter Tie

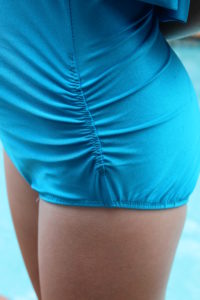
A very simple, but nice touch was the ruching on the sides.  It’s so easy and looks so professional.

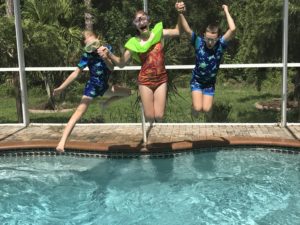
The acid test was jumping in and horsing around with her brothers.
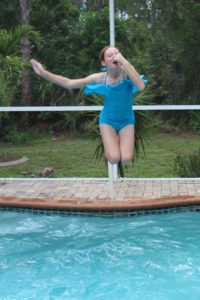
It survived!


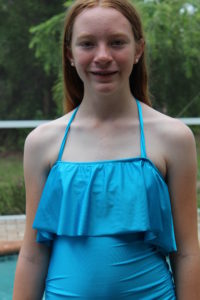
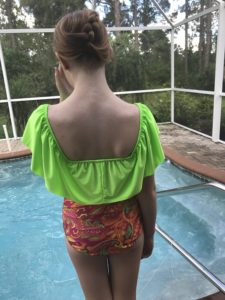
There were a couple small problems.  I felt like I couldn’t tie it tight enough to keep the suit up but not be too tight around her neck.  Also, there was a lot of extra fabric in the back.  I decided that it was because there was nothing to hold the back up, so it just kinda sagged down.  The elastic in the top was pretty loose too – in hind sight I should’ve measured the elastic around her before I sewed it to the swimsuit which would’ve helped with the sag.

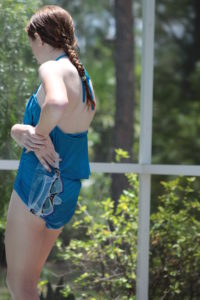
Note the sag at the top of the back and the saggy butt look. Both of which we want to avoid!

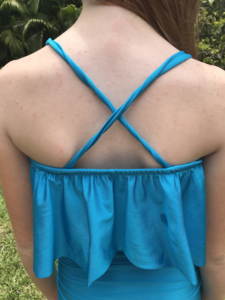
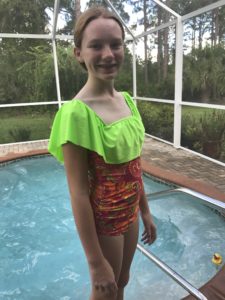
Since I didn’t want to have a date with my seam ripper and rip the whole elastic piece out, I opted for the simpler solution – cross the straps and attach them in the back.  I had her try on the bathing suit and shortened the straps enough so they pulled the back up, but were still loose enough to get the swim suit on and off.  Presto!  Perfecto!

Criss Cross Straps Camila Swimsuit

What my daughter really wanted though was to have the ruffle on her shoulder.  View A has an off-the-shoulder ruffle with shoulder ties, but there isn’t enough room to pull the ruffle up on the shoulders.  So, I used the ruffle from the Daphne top & dress.  I attached it just like you would normally for View A, but the part of the ruffle not attached was much longer.  I used the elastic measurement from Daphne and attached it like Camila.  The result was perfect!

Sewing swim suits is not hard!  You need to take your time, make sure you have the right kind of needle (ball point), and remember pins or clips are your best friend!  Take the plunge!

*This post contains affiliate links.  For more information, see my disclosure policy.

Pattern Review – Cache Cargo Shorts & Boulder Tee

*This post contains affiliate links.

I recently tested the two newest patterns by Gracious Threads – the Boulder Tee and the Cache Cargo Shorts.

The Cache Cargo Shorts are the perfect addition to my boys’ summer wardrobe.  I love the side pockets plus the cargo pockets.

The back flaps are fake pockets (although it you wanted, you could use the welt pockets from the Dax Trousers to make them real).

The shorts have a real working fly – and it isn’t nearly as complicated as I thought it would be!


The Boulder Tee is a quick and easy sew with a couple options – short sleeve or banded 3/4 sleeves, pocket or no pocket, and optional sleeve stripes.

I love the little design element the sleeve stripes add.  Such a simple thing yet it makes the t-shirt different from just a plain t-shirt.

I also used it to make a swim shirt for my son.  I just made the seams a little deeper so it was a little tighter.  The swim shorts are the Monaco Swim Trunks by Peekaboo Pattern Shop.  Fabric is from Peekaboo Fabric Shop.

Gracious Threads is having a sale this weekend on all their patterns.  I have the Jasper Joggers which I used to make school uniform pants and then I also cut them of to make shorts.

Gracious Threads Sale

*This post contains affiliate links.  See my disclosure policy for more details.


Dyeing Polo Shirts

Dyeing Polo Shirts

I’ve had two light colored polo shirts that were stained, but I hated to throw them away because they were pretty new (as in they got stained on one of the first wearings).  I washed them, rewashed them, treated the stains, retreated the stains, washed them some more, but nothing worked.  So, they’ve been sitting on my sewing desk waiting for me to figure out what to do with them.  Then, I wondered about dyeing them.  I chose purple because it’s darker and I’m hoping that it will cover the stains.  For about $2, it’s a pretty cheap way to remake a shirt!

All you need is a box of dye and some shirts.

I opted to dye them in a bucket (an old kitty litter pail).  I filled it about half way with hot water and added some hose water.  Although the directions said to add 3 gallons, I didn’t measure.  The only thing I did measure was the hot water to mix the dye.

MixTheDye

AddTheDye

I heated water on the stove, soaked the shirts and then added the whole mix to the dye.

WetThePolos

When I dunked it in and then lifted it right back out I wasn’t sure I was going to like it.

AddPolosToDye

About 20 minutes later when I checked it and the color was so much better!

Checking the dye color.

After about 25 minutes, I was happy with the color.  I dumped my dye and then rinsed the shirts in clean water.  I kept rinsing until the water was clear.  Then I hung it over a chair to drip dry.  When it stopped dripping, I tossed it in the dryer…then I re-read the directions and saw that I was supposed to wash it first.  Oh well.  I’ll just wash it separately for the first couple times.

DryingDyedPolos

So, because I didn’t wash it right after I made it, I washed the dyed polo shirts with our towels.  I don’t care so much if the towels come out with a purple tint.  Although the the water did get a little purple, my towels were OK.  I’ll probably continue to wash them with towels until they don’t make the water purple though.  Better safe than sorry!

Washing a dyed shirt

The dye covered the stains pretty decently, but not the thread.

The dye didn't cover the stitching.

It did make slightly darker spots where the stains were, but I don’t think they’re very noticeable.  Definitely not as noticeable as the stains before I dyed the shirts.

Finished Dyed Shirt

Have you ever dyed anything?  Did it work out?

Pattern Review: Dax Trousers by Gracious Threads

Dax Trousers by Gracious Threads

*This post contains affiliate links.

I recently got to try our the new Dax Trousers by Gracious Threads.  I was a little nervous about it – a real, working fly?  Double welt pockets?  Yikes!  The only thing I skipped was the belt loops.  This pattern taught me a lot!  I’ve never done an actual fly before.  I always thought it was hard – isn’t that what you’re always told?!  Turns out, it really isn’t that bad!  The instructions with the pattern were great, but if you need more help, there’s a free guide that you can download too (link is in the pattern).  It includes more pictures plus instructions on shortening zippers.

Dax Trousers by Gracious Threads with fly closed.

I still need a little practice, but I’m so happy with how it turned out!  The best part is that it really does work!

Dax Trousers by Gracious Threads with fly open.


I’ve also never done welt pockets.  Mostly because I’m scared of them.  Also, they involve cutting a slit into your material – in the middle…if you mess up…..what to do??  Well, in reality, they weren’t that bad!  The directions walk you through each step plus there’s a link to a video walking you through the process. I made the whole pocket out of a contrasting material to add some detail to the shorts.  If you just do the lining from a different material, you won’t see it on the outside.  I’m so happy with how these turned out!  Two new skills in one pattern!  That’s a win!

Welt Pockets Dax Trousers by Gracious Threads

The pattern is actually for pants but since we’re in Florida, I cut them off to make shorts instead.  I measured the inseam of a pair of shorts that currently fit and used that as a starting point for the length of these.  I love the how nice the finishing touches (mostly the top stitching) make them look – almost like they were store bought.  If you are on good terms with your twin needle, these would look sharp with two rows of top stitching.

I even made a second pair and they turned out equally nice (and it didn’t take me as long to make them!).

Dax Trousers by Gracious Threads

This pattern is currently available through One Thimble or as a stand alone pattern.  While I went with jean material, this pattern could also be used to make slightly dressier pants.

Dax Trousers by Gracious Threads

Go check it out and then let me know what you’re planning to make.  Have you ever done a real fly or welt pockets?

*This post contains affiliate links.  See my disclosure policy for more details.

Pattern Review – Fav Tee by Patterns for Pirates

Fav Tee by Patterns for Pirates

*This post contains affiliate links.

I recently tested the new Fav Tee by Patterns for Pirates.  As with all her patterns, there are tons of options and the directions are excellent!  I chose to make a short sleeve dress length shirt with a rounded neckline.  I also added about 2 inches to the length of the striped dress.  When I made the color blocked one, I felt like it was just a little too short to wear alone.
Sleeve view of Fav Tee by Patterns for Pirates

This shirt dress went together super quick!

Front view of Fav Tee by Patterns for Pirates

This dress has quickly become a favorite for throwing on when she needs to change quickly.

Fav Tee by Patterns for Pirates

There are so many other options – v-neck, long sleeves, 3/4 sleeves, tunic length with side vent, or shirt length with knot hem.

Side view of Fav Tee by Patterns for Pirates

I had this orange color that I loved, but it wasn’t quite long enough for the back hem.  I color blocked the bottom and used the same material for the neckline.  I love the way it came out!  Color blocking is super easy!  When I cut the print piece, I added an inch to the top (the straight edge) for the seam allowance (1/2″).  After sewing the two back pieces together, I followed the directions for the dress.

Fav Tee by Patterns for Pirates

Buy the Fav Tee and check out the Mama Favorite Tee and a Favorite bundle.  Buy your favorite (get it??) and then come back and tell me what you made.

*This post contains affiliate links.  See my disclosure policy for more details.

  • « Previous Page
  • 1
  • …
  • 9
  • 10
  • 11
  • 12
  • 13
  • …
  • 43
  • Next Page »

Hi, I'm Mona - wife, mom, teacher, seamstress, blogger. This is my home on the web. Read More…

Categories

Copyright © 2026 · The Marianne Theme By Blogelina · Built on the Genesis Framework

Copyright © 2026 · The Marianne on Genesis Framework · WordPress · Log in