SewMona

A slice of my Florida life

  • Sewing
    • SewMona on Etsy
    • Clothes
      • Boys
      • Girls
      • Men
      • Women
    • Pattern Reviews
    • How to Sew
  • Camping
    • Florida Campgrounds
  • Recipes
  • Crafts
  • DIY
  • About

Making A Tiered Skirt – Pattern Hack

Making A Tiered Skirt

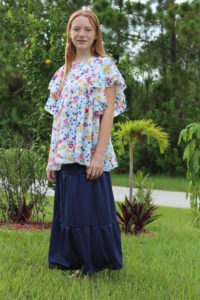
I recently made my daughter a Chloe skirt (a yoga waistband maxi skirt by Made for Mermaids).  She loved the maxi length and wanted a knee length one too.  Well, I didn’t actually measure her when I made the shorter one and it was a little too short (her feelings too, not just mine plus she’s on the tall side so even though it isn’t really short, it looks like it is).  I hated to scrap the skirt and was sure there was some way I could add length to it.  I thought about just adding a ruffle to it, but I wasn’t sure it would look right.  Then I wished I could make it into a maxi length somehow.  Tiered skirt to the rescue.

Chloe Short Skirt, Before

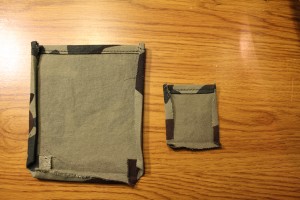
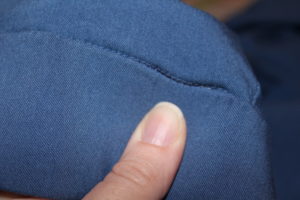
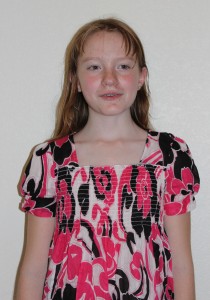
The short Chloe – she really likes it, but wished it either was a couple inches longer or had shorts attached.

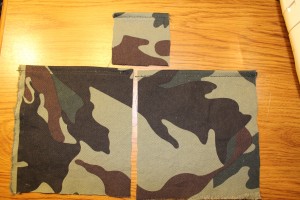
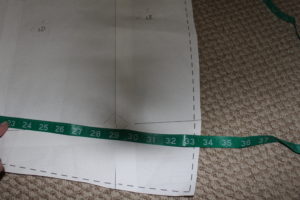
I measured the length of the maxi Chloe and divided by 3 (I wanted three tiers).  I added an inch to that number for two 1/2″ seams (in my case 33″/3 = 11″ + 1″ = 12″).

Length of the Chloe Maxi

For the first tier, I used the Chloe pattern and cut the skirt at 12″.  For the second tier, I cut a rectangle that was 12″ high and the width of the bottom of the first tier + 10″.  You should add at least 25% of the width but not more than double.  So, if your bottom measurement is 20″, the next one should be at least 25″, but no more than 40″.  Repeat for each tier.  The longer the piece is, the more gathers it will have.  I wanted very little gathering for this skirt.

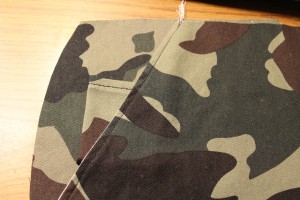
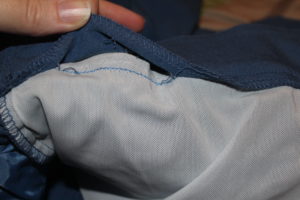
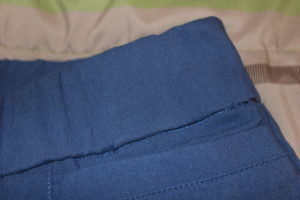
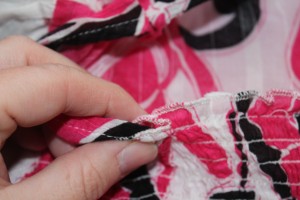
Sew the short edges of each tier together so you have a circle or fabric.  Run a gathering stitch around the top of each tier.

Gathering Stitch Set Up

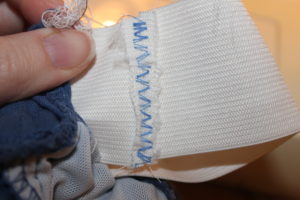
A gathering (or basting) stitch is a long straight stitch with no back stitches at the beginning or end.

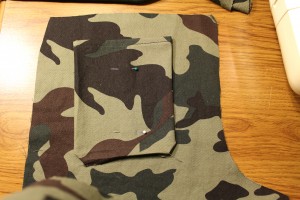
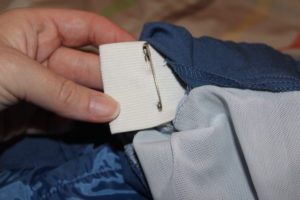
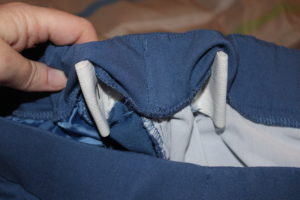
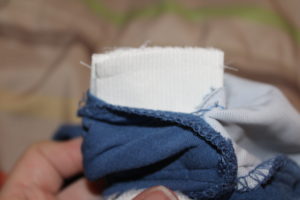
Pull up the gathering so that it fits the bottom of the tier above it.  Spread the gathers evenly, pin, and sew.  Repeat for each tier.  Make the waistband per the instructions in the pattern.

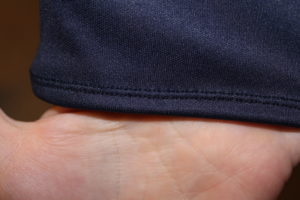
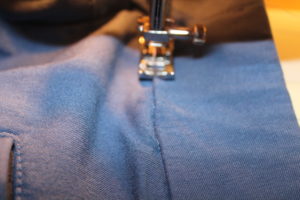
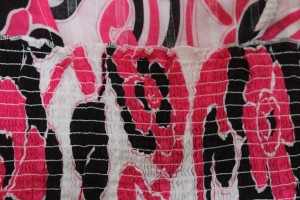
I’ve been using my twin needle a lot recently, and I pulled it out again for the hem of this skirt.  I love the professional look of two perfectly spaced rows of stitching.

Hem with twin needle

Chloe skirt with Grace top.

Tiered Skirt, Chloe Pattern Hack

How To Sew: Shortening 3/4 Sleeves

How to sew shorten sleeves

I’m working on a series of posts about adjusting clothing to fit.  To see all of them click here – How to Sew.

I’ve had this shirt for several years now.  I really like it, but I’ve only worn it a handful of times.  Why?  It has 3/4 length sleeves with a button cuff.  I’m not sure who thought that would be comfortable, but it isn’t!  The sleeve can’t slide up and down my arm.  No matter how I move my arm, the sleeve stays right there – half way between my elbow and my wrist.  It means the rest of the shirt pulls up whenever I reach.  I’m not into showing off my midriff and it’s just plain uncomfortable.  So, it mostly sits in my closet.  Why have I kept it?  Well, I do like the style & the print.  It’s also nice material with 3% spandex so it has a little give to it.

Button Up Shirt with 3/4 Length Sleeves

The other day, I wanted to wear it, but as soon as I put it on, I remembered why I don’t.

Button Cuff Doesn't Let Sleeve Slide

The sleeve can’t slide past my elbow. Very annoying!

Plus, now that I live in Florida, I don’t have much need for anything beyond short sleeves.  I’m not sure why I didn’t think of it sooner – I’ve shortened a lot of hubby’s dress shirt sleeves.  It’s so easy!

Cut the sleeve off at the desired length plus 1/2″ for the hem.Cut Sleeve Off

Using the cut-off as a pattern, cut the other sleeve to match.Cut Other Sleeve to Match

It looks better already!Sleeves Shortened

All they need is a quick hem.

Turn under 1/4" on the sleeve edge.

Turn under 1/4″ on the sleeve edge.


Turn under another 1/4" and sew in place.

Turn under another 1/4″ and sew in place.


Finished Sleeve

My new short sleeved shirt.

My new short sleeved shirt. (and yes, I purposely told my daughter to not get my face).

Don’t forget to take the buttons off the cuffs before you toss them.  You can never have too many extra buttons!

How To Sew: Adding Pockets to a Pattern

How to Sew: Adding Pockets to a Pants or Shorts Pattern

I’m working on a series of posts about adjusting clothing to fit.  To see all of them click here – How to Sew.

One of my new favorite patterns is Jasper Joggers.  They are a quick and easy sew.  The only thing “missing” is the back pockets.  There are two front pockets, but the back pockets are fakes.  That’s fine by me, but my boys wanted back pockets.

I’m adding two back pockets and a little front pocket.  I just eyeballed the size, but you could measure pockets on an existing pair of pants (or the little hands that will be using the pockets) if you’re unsure.

Cut Pockets the Size You Want

Hem the top edge of the pockets by turning down 1/4″ and then another 1/4″.

Hem the top of the pocket by doing a narrow hem.

Press 1/4″ and then another 1/4″ under on the remaining edges.  For the smaller pocket, I only turned under 1/4″ otherwise it was too hard to work with.

Press the edges of the pockets under

Three pockets ready to sew on to the pants.

Pockets all pressed and ready to sew on to pants

Place the little pocket where you want it positioned on the front pocket.  Don’t forget about your seam allowance (so it doesn’t end up too close to the side seam).

Place the little pocket where you want it.

Place one back pocket where you want it – I centered mine between the top & sides.  Don’t forget about the waistband – in this pattern, you add a waistband so it will make the pockets lower.

Place one back pocket where you want it

To make sure the other side matches, lay the other pocket upside down (right sides together) over the pinned pocket.

Lay the other pocked over the pinned one

Then lay the other back piece over the pocket making sure the edges line up.

Lay the other back piece over the pocket

Carefully lift up one side and pin the pocket into place.  Then lift up the other side and pin it there too.  You should end up with two perfectly matched pockets.

Left up edge and pin pocket in place

Sew the pockets in place.

Sew the pockets into place

Finish sewing the pants/shorts according to the directions.  Then find your little model and admire the pockets.

Little pocket sewn into place

Back pockets sewn into place

How To Sew: Taking in Elastic Waist Pants (or Capris or Shorts)

TakingInElasticWaistPants

I’m working on a series of posts about adjusting clothing to fit.  To see all of them click here – How to Sew.

My mom recently gave me a pair of capris that didn’t fit her real well (apparently they did until they met the dryer).  She thought they might fit me.  They are a nice slightly stretchy pair of blue capris.  They fit me perfectly except for the waist – it was just slightly too big and gaped in all the wrong places – not good for a kindergarten teacher who needs to be able to move around.

To fix an elastic waist, you need to open up the seam, cut the elastic, resew it, and then close up the seam.  Easy enough, right?  First, look at the waistband to see how the elastic is put in.  On this pair, the elastic is sewn to the capris at the sides.

See the stitching between my fingers? That’s tacking the elastic down. It helps make sure the stretch is even and helps the elastic not to fold in half.

See the stitching between my fingers? That’s tacking the elastic down. It helps make sure the stretch is even and helps the elastic not to fold in half.

To get to the elastic, you will need to remove some of the waistband stitches.  Because the elastic is tacked down at the sides and because I don’t want to rip out the stitches through the elastic, I’ll rip open a small piece on each side of the side seam.  If your elastic isn’t tacked down, you’ll only need one opening.

Stitch in the Ditch

This is the stitching you will need to remove.

The opening only needs to be about 2 inches – enough to pull the elastic out and tighten it.

Seam Opening

Pull the elastic out through the openings and pin it to the desired tightness.  Make sure to tighten the front and back equally if the elastic is tacked down.  Try them on to be sure they fit.

Pinned Elastic

Double check that you’ve tightened the elastic evenly in the front and back if it’s tacked at the sides.

Make sure elastic is pinned evenly

Make sure the elastic is pinned evenly in front and back.

Once you’ve tried them on and are sure you like the fit, sew the elastic together where you pinned it.  Use a ball point needle and either a stretch stitch (I use a triple stretch stitch) or a zigzag to avoid having a tangle of thread.  Trim the extra elastic close to your stitching – leave about 1/4″.

Trim elastic close to the seam

Spread the seam flat and using a wide zigzag stitch, sew it down.  This will prevent a bulky place in the waistband.

Zigzag seam flat to prevent a bulky spot in the waist

Tuck the elastic back in the waistband and fold the fabric back down.  Carefully sew it back down.  In this case, I did what is called stitch in the ditch.  I sewed in the seam made when the waistband was attached to the capris.  This stitching is barely visible when finished.  You do need to take your time doing it so that it looks neat when you’re done.

Stitch in the ditch to close up the openings.

The finished stitch in the ditch doesn’t show much.

Finished stitch in the ditch barely shows.

Finished capris – the elastic is evenly stretched between the front and back.

Stitch in the ditch all finished

How To Sew: Taking In A Smocked Shirt

How To Sew: Taking In A Smocked Shirt

I’m working on a series of posts about adjusting clothing to fit.  To see all of them click here – How to Sew.

My daughter was given this shirt.  She loved it and wanted to wear it to school right away.  I didn’t pay much attention to the size and apparently didn’t really look at it when she tried it on.  The back was so gap-py and the front kept creeping down lower than she likes.  I put a rubber band around the back to take it in for the day (it was covered by her long hair).

too big shirt neck

The easy part of this was taking in the shoulder seam.  I took in about 1/4″ – 1/2″ and narrowed it down to match the existing seam.  This helped a little bit.

ShoulderSeam

When the shirt is on, you can’t even tell there’s a little extra seam there.
Take In Shoulder Seam

Fixing the smocking took some thought.  My first thought was to add a piece of elastic over the top piece of elastic on the smocking.  However, that didn’t work so well and I ended up taking it off.  Plan B was to just take tucks on either side.  That turned out to be much easier.  I only sewed them at the top smocking seam line.


Make a small fold on either side of the smocking

The tucks are barely noticeable.

The tucks are barely noticeable.

Now, she can wear the shirt without constantly pulling it up in front and pulling the shoulders back up.

Finished Smocked Shirt


  • « Previous Page
  • 1
  • 2
  • 3
  • 4
  • Next Page »

Hi, I'm Mona - wife, mom, teacher, seamstress, blogger. This is my home on the web. Read More…

Categories

Copyright © 2026 · The Marianne Theme By Blogelina · Built on the Genesis Framework

Copyright © 2026 · The Marianne on Genesis Framework · WordPress · Log in