SewMona

A slice of my Florida life

  • Sewing
    • SewMona on Etsy
    • Clothes
      • Boys
      • Girls
      • Men
      • Women
    • Pattern Reviews
    • How to Sew
  • Camping
    • Florida Campgrounds
  • Recipes
  • Crafts
  • DIY
  • About

Upcycling A Sweatshirt

Sweatshirt to Raglan

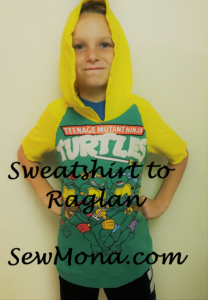
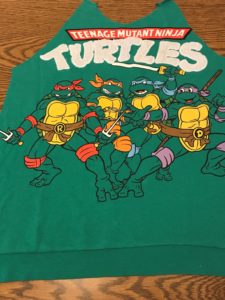
My son recently found a Ninja Turtles sweatshirt in a bag of hand-me-downs.  It’s too big for him, but he wants to wear it now.

So sad, the Ninja sweatshirt is too big

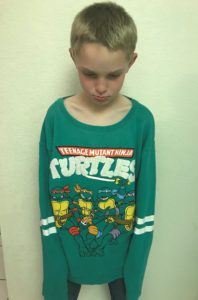
It’s also long sleeved and we live in SWFL where it’s almost always summer (except for a couple weeks in January where I actually had to turn the heat on…I hate turning the heat on!).

Long sleeves are no good in Florida

Anyway, I found the perfect color of cotton spandex in my recent material order so I can make him a raglan – short sleeves, possibly with a hood.

So happy the shirt can be resized

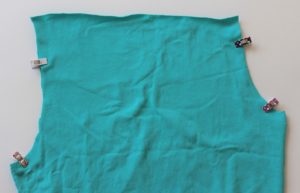
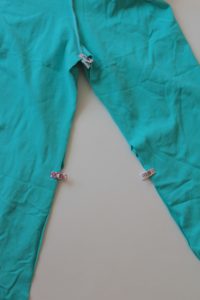
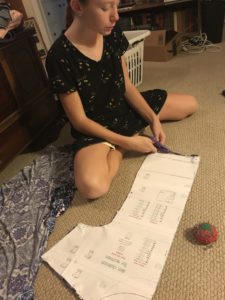
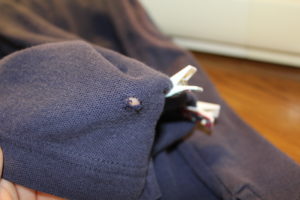
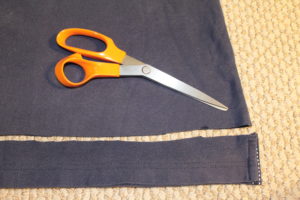
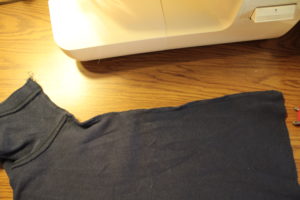
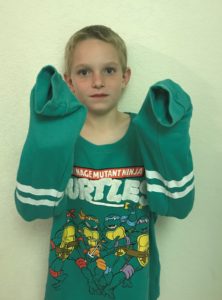
My first step is always to cut the sleeves off.

Sweatshirt to raglan - cut off the sleeves

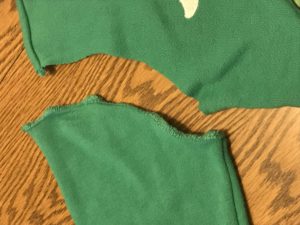
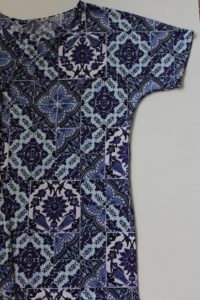
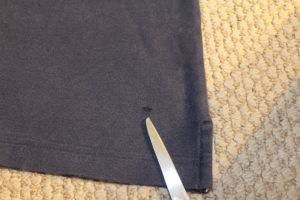
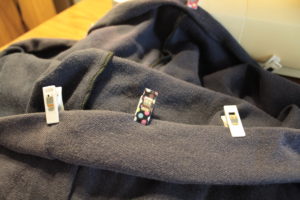
Since I don’t want to rehem the shirt, I’m not going to cut the side seams.  This makes laying the pattern pieces out a little tricky, but hopefully it will work out.  The print on the front was slightly off center meaning that when I cut out the new front, I’m going to cut some of this sword off.

Cutting the front piece out is tricky

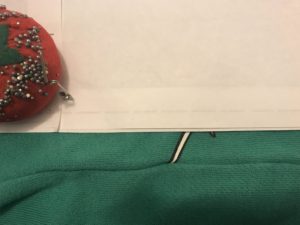
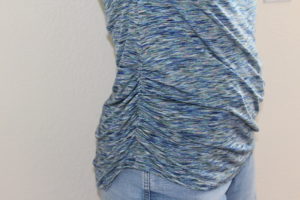
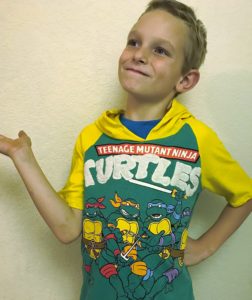
The front doesn’t look too bad.  I believe the original shirt was a 14/16 and I’m making a 10.  Not a huge change, but even so, the design just fits on the front.

Front piece cut out of old sweatshirt.

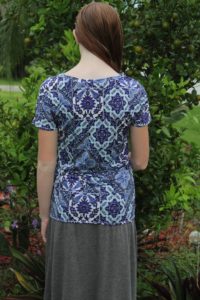
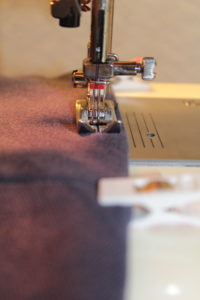
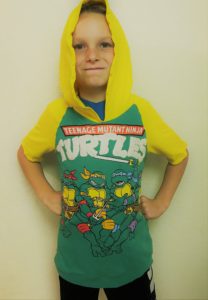
I’m always worried that the neckline is going to be too big, but I’ve learned to wait until I have the hood or neck band on…it always looks much better!

Sweatshirt turned raglan

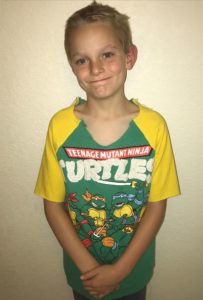
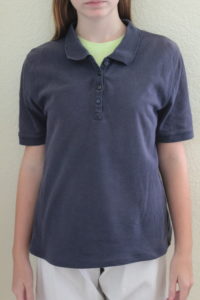
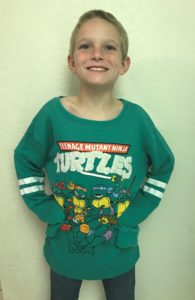
With the hood sewn on, the neckline fits so much better and there’s still some growing room (very important!).

A new raglan upcycled from a sweatshirt.

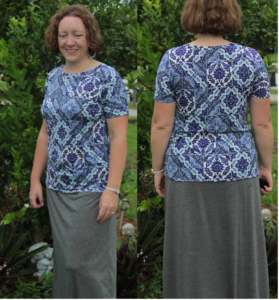
This kid loves making all different faces while I’m trying to take pictures.  Plus we’ve got a new cat who thinks he needs to try opening all the doors.

A new raglan upcycled from a sweatshirt plus the cat.

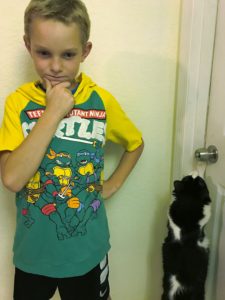
Really Mom, you need another picture??

A new raglan upcycled from a sweatshirt.

So, have you ever upcycled a shirt into something new?  If not, you should try it!  It’s really not that hard.

A new raglan upcycled from a sweatshirt.

*affiliate link* The pattern I used here is the Rowan Raglan.  If you buy it through my link, I earn some money (it doesn’t cost you anything extra!  🙂  ).  Read more about affiliate links on my disclosure page.

How to Sew – Free Leggings for Kids and Adults

 How To Sew plus a free leggings pattern
*This post contains affiliate links.

I’m not much of a leggings person, but my daughter wears them under her school skirts frequently.  They’re perfect for keeping her modest on the playground and some of her favorite school uniform skirts are the ones that have leggings attached.

Fun leggings under a boring school skirt

Leggings are pretty quick and easy to sew up and there’s nothing better than a free pattern!  Feel free to skip to the end of the post if you just want the links.  Otherwise, read on for my review of the Bonny Leggings.

Bonny Leggings Capri Length

Leggings require material with good recovery – it should have at least 5% spandex/lycra otherwise you’ll have saggy knees and if you do a yoga style waistband, they won’t stay up all day.  Talk about a wardrobe malfunction!

I assemble my leggings differently than the instructions.  I prefer to sew the center front and back seams first.

Sewing the center front and back seams first.

Then I sew the inseams together.

Sewing inseam after center seams.

Then sew the waistband on per the instructions.  The waistband does not need to be stretched to fit – it should fit the opening perfectly.

The bonny leggings pattern comes with directions for making a knit skirt to attach to your leggings.  Once you’ve made a skirt with the leggings and know how to attach the leggings to the skirt, you can use the leggings with your favorite skirt pattern to playground proof your daughter’s wardrobe.  It’s so easy!  Plus, if your school requires a certain color skirt (like navy or tan….boring!), you can add a fun print for the leggings.  No one will know, but it’s a fun way to dress up her school wardrobe.

School Uniform skirt with fun leggings

The kid leggings are available here in sizes 1/2 – 14 – Bonny Leggings.  They are totally free – no facebook groups to join, just add the pattern to your cart and checkout.

The adult leggings are available here (and in full disclosure, I’ve never made them, I’m just pointing them out for adults who may want leggings or for older girls who don’t fit into Bonny’s anymore) – Peg Legs.  Please note there are also a couple add on packs which are also free – a maternity add on and an add on with more options – waistband, color blocking, side pocket.

*This post contains affiliate links.  For more information, see my disclosure policy.

Sewing Books and Patterns

 Sewing Books and Patterns
*This post contain affiliate links.

If you follow me on Instagram, then you know I recently discovered sewing books.  I don’t know why it never occurred to me to look for sewing books, but….  I’ve read four so far (having a real job really cuts into my reading time!).  I’m including the Amazon links to my favorite three books, but I found them at my local library in the non fiction section in the 646 section.  Make sure to see what other books are there – I need to remember to check out that section at one of my local libraries (I have two close to me).

So far, my three favorite sewing books are The Magic Pattern by Amy Barickman, Make Your Own Patterns by Rene Bergh, and The Sewing Bible by Ruth Singer.  All three of these books teach you about sewing and patterns and then have some projects for you to try.

Make Your Own Patterns 

This book details how to design and/or alter patterns that are custom fit for you (or your spouse or your child or whomever you choose).  If you are interested in designing your own patterns or altering existing ones, this is the book for you.  It includes all the measurements you need to draft or modify a well fitting pattern.  Bodices, necklines, sleeves, blouses/tops, jackets, skirts, dresses, and trousers are all covered.  There are also basic quarter size patterns that you can enlarge and then customize to your size and style using either their ideas or your own.


The Magic Pattern

This book comes with a CD with the patterns from the book.  The idea of making six different items from one pattern is intriguing.  In theory, you could make an entire wardrobe with just these patterns (and the book gives you suggestions for taking the patterns from one season to the next).  The six patterns are a tank top, skirt, dress, cardigan, coat, and accessory (hat).  Add your favorite pair of shorts, jeans, and/or leggings and you’re all set.  I did find the list of tools you will need to get started to be a little bit excessive.  My list of sewing tools you need to get started includes only the basics.  I do like the description of different kinds of fabric you can use.  Printing these patterns is very much like PDF patterns that you can buy – print the pattern, measure the test square, and then fit the pieces together.  There is good information on adjusting the pattern and finishing techniques.


The Sewing Bible

This book has so much information about all kinds of sewing techniques!  You can learn about hand sewing and machine sewing in this book.  There are so many hand sewing stitches.  Several that I’ve never heard of and did you know you can sew buttonholes by hand?  Yikes!  Might be OK for just one, but I can’t imagine trying to make several all look the same!  Plus, I’ve made friends with my button hole maker on my sewing machine.  You can learn quilting basics, different seam types, different ways to install a zipper as well as other fasteners.  There are so many different kinds of seams!  You can learn about shirring and smocking.  After you’ve learned the practical and decorative techniques, there are projects you can do.  This book is a great reference guide for both beginners and advanced sewers (sew-ers).

What’s your favorite sewing book?

*This post contains affiliate links.  See my disclosure policy for more details.

How To Sew – Making A Dolman Plus Get A Free Pattern

*This post contains affiliate links.

MotherDaughterDolmans

I was so excited because I really wanted to do a dolman style shirt for the next easy pattern and I recently discovered a free one!  You have to join the Facebook group to get the code for it.   The wide range of sizes (00-26) is another reason I like this pattern – I can make shirts for my daughter and me from the same pattern.  She’s a teenager and sometimes she fits kids sizes and sometimes she doesn’t.

Dolman Slim Fit

Dolmans are really easy because there are no sleeves to sew in since they are part of the body (although there are options to add long sleeves to it).  Two seams, a neck band, sleeve hems, and the bottom hem.  This pattern is also for knits so you’ll need a ball point needle.  Either a size 14 or 11 (The thinner the material the smaller needle number).

Halla Slim Fit Dolman

I decided to have my daughter make one of these with me – just to show how easy it is.  Her least favorite part is pinning and cutting and yes, we’re on the floor…not ideal, but it works in a pinch.

Learning to cut out a pattern

Just to keep things real – she didn’t actually get to sew her shirt.  My machine was giving her fits – skipping stitches.  It turned out that I was using the wrong size needle and then the needle was bent just the slightest bit.  By the time I realized that, she was done.  Since I don’t want to force her to sew, I finished up her shirt.

Even though this pattern is free, there are still options!  Don’t like the slim fit?  You can make it less fitted.  Want bat wing style sleeves?  You can do that too.  The best part is, these are techniques that you can use to alter other patterns you have.  There are two neckline options.  For my daughter, I did the higher neckline and for mine, I went with the lower neckline – still perfectly modest, just not as high.  I tried on the shirt before I put the neckband on and was concerned that the neck was going to be too big.  Never fear, once the neckband was on, it fit perfectly!

Halla Slim Fit Dolman Front and Back

The dolman pairs perfectly with the Chloe maxi skirt (also free and super easy) from Made for Mermaids (which is what we’re wearing in our matching pictures).  I’m sure that at some point in the future, my teenager won’t want to match me, but for now she loves it.

Halla Slim Fit Dolman and Made for Mermaids Chloe

The Hallå Slim Fit Dolman is available for women in sizes 00-26.  Join their facebook group to get the code to get it free (read the pinned post).


Another option for a dolman pattern is the Sun Kissed Tee dolman by Peek-a-Boo Pattern Shop.  It is NOT free, however she does have sales on occasion.  It’s a simple no frills pattern, but there’s an option to add ruching to the sides which is why I love the pattern!  I think the ruching adds a nice touch and it’s really not that hard.  There are others with more sleeve and hem options, but for beginners, I really like these two.

Dolman shirt with ruched sides.

*This post contains affiliate links.  See my disclosure policy for more details.

How to Sew – Making A Polo Shirt Smaller

The private school where I teach (along with DH and our kids also attend) requires us to wear polo shirts.  Polos are one thing I’ve never tried making.  I buy the $5 ones at Old Navy during our tax free weekend.  Occasionally I find them at a thrift store for less than $5.  Last year, I managed to get a hole in my navy blue polo.  It was still in really good shape otherwise.  I hated to throw it away!

Navy blue polo with a hole near the hem

It really is a little hole and lucky for me (and my daughter), it’s below where the hem needs to be for her.

Navy blue polo with a hole near the hem.

So, I just trimmed it off.  Ignore my horrible cutting…I just eyeballed it and clearly didn’t do a very good job.  Hemming will fix that!

Trim the hem off the polo

I also took the side seams in a bit so it wasn’t quite so baggy on her.

PoloSideSeam

Turn up the hem – I turn under 1/4″ and then another 3/4″ so the hem looks neat and you don’t see any unfinished edges.

PoloHemClipped

Hem the shirt with a double needle for a professional finished look.  Make sure to hem with the right side up if you’re using a double needle.  Also, this is one of the many reasons I love these clips – it doesn’t matter which way I put them on, I can sew with either side up.  With pins, you have to sew with the side you pined facing up.

Hem the polo with a double needle for a professional finished look

The finished product – a pretty good fit for my teenager and there are no holes in it!

  • « Previous Page
  • 1
  • 2
  • 3
  • 4
  • Next Page »

Hi, I'm Mona - wife, mom, teacher, seamstress, blogger. This is my home on the web. Read More…

Categories

Copyright © 2026 · The Marianne Theme By Blogelina · Built on the Genesis Framework

Copyright © 2026 · The Marianne on Genesis Framework · WordPress · Log in