SewMona

A slice of my Florida life

  • Sewing
    • SewMona on Etsy
    • Clothes
      • Boys
      • Girls
      • Men
      • Women
    • Pattern Reviews
    • How to Sew
  • Camping
    • Florida Campgrounds
  • Recipes
  • Crafts
  • DIY
  • About

Sun-N-Fun, Sarasota, FL

Sun-N-Fun RV Resort Sarasota, FL

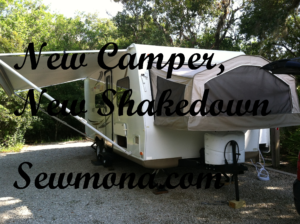
After our initial shakedown cruise, we went on another short trip.  When we bought the camper, the dealership gave us some coupons for free camping.  One of them was a free night at nearby Sun-N-Fun in Sarasota, FL.  Of course, you can’t go for just one night so we paid for another night.  Let me say that this is not the type of campground we normally look for – anything with “resort” in the name tends to be pricey (we paid $58 for the second night).  However, they had a ton of things to do, but first, let’s talk about the campsite.

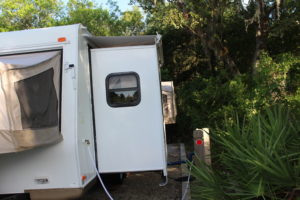
We had a premium site which means it’s a back in with a concrete patio.  I misunderstood when I called which is why we were in a premium site.  I actually just wanted a standard site (no concrete patio) in the shade.

Sun N Fun Campsite 
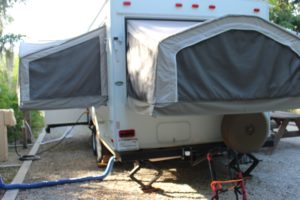
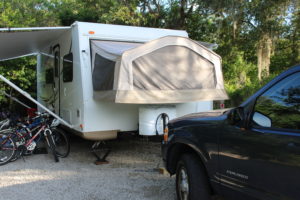
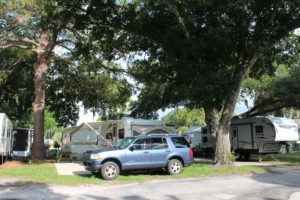
Anyway, that big tree behind the car is on corner of our site along with big ol’ roots that I had to back over.  Then there’s the concrete patio on the other side.  Also, it’s on a weird intersection – it’s at an angle and there’s a telephone pole that I had to make sure I didn’t hit.  Add to it our general inexperience in backing up and it took some doing!  We finally got backed in and leveled and started hooking up…more problems.  Our water hook up is near the front of our trailer and the campsite water was at the very back of the site.  There was just no way to make our 25 foot hose reach.  We thought about hooking up and backing up some more, but even then we’d still be too far away.  We talked about filling our water tank, but the hose still wouldn’t reach unless we backed up some.  Then we realized that our sewage hose probably wouldn’t reach either.  *sigh*  Happily, my parents had given us an extension for our power cord so at least we had electricity.  WalMart was only 15 minutes away so I made a trip there, located a drinking water hose and a sewage hose extension.  Finally we were all hooked up!

Sun n Fun Pool

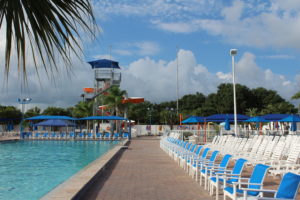
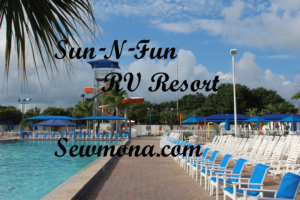
Then we went to check out the real reason we were here – the pool!  It’s an olympic size pool and it is huge!  Since it’s summer, there weren’t nearly as many people as I imagine there are in the winter when all the snow birds are there (there are around 1700 sites).  Our kids had a blast swimming and hubby and I swam a lap or two (did I mention that olympic size pools are huge?!).

Sun N Fun Water Slide

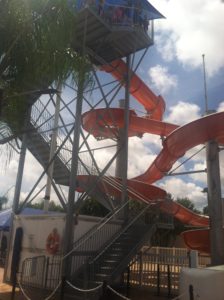
On our full day there, we bought water slide passes for the kids and I ($5 each).  I wasn’t going to get one, but the kids wanted me to so I did (they didn’t have to twist my arm!).  I went down a few times, but the kids – they definitely got their moneys worth!  Climbing 4 stories of stairs over and over tired them out!  The water slide isn’t a super fast one, but you can get some speed if you lay down (just remember to pinch your nose at the bottom – I got a nose full of chlorinated water the first time.  Bleh!).

There are paths all around Sun-N-Fun

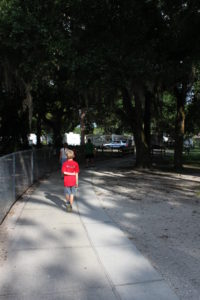
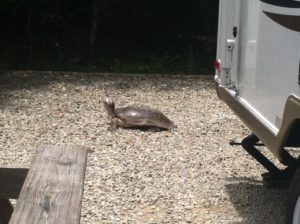
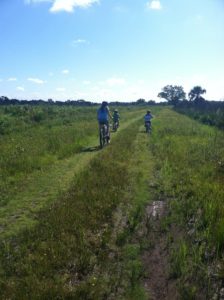
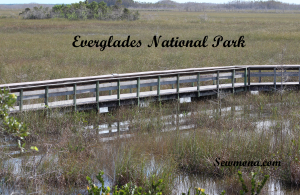
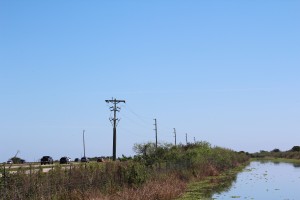
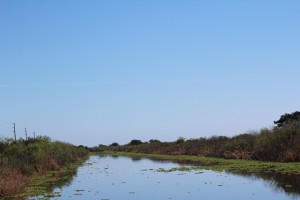
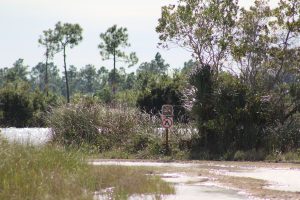
One of the many paths all around Sun-N-Fun

They also have a mini golf course, ping pong, bean bag toss, carpet ball, tennis courts, disc golf, and foot golf (that we saw while walking around – there may be more).  They supply all the equipment.  There’s also a playground.  Plus there’s a gym for an additional fee.  There is no way to be bored at Sun-N-Fun!

Do you like staying at resort style campgrounds?

New Camper, New Shakedown

New Camper, New Shakedown Cruise

As I mentioned here, the first trip you take in a new camper is usually your shakedown cruise.  Typically it takes place close to home.  The idea is to see if you’ve forgotten anything that you can’t live without and to make sure that everything works right.  So, after we got our new (to us) camper home and loaded, we headed off to our new favorite camping spot for a two night shakedown cruise.

My new favorite view.

My new favorite view.

When I made reservations, I had a chance to pick a pull thru spot.  I was tempted, but I also know that I need to learn how to back in.  Our camper is only 21 feet long (our pop-up was 21 feet when it was all opened up – I think it was only 10 feet when it was closed).  However, when I’m trying to back into a spot, it seems like it’s so much longer!  I realize that I just need practice thus the back in spot.  I actually did pretty good this time and the sites are pretty level so no leveling boards required.

All Backed In for our Shakedown Cruise

I managed to get us nice and close to our hook ups. Plus, we had a visitor wander through our site.

Our Visitor in our site

Setting up this camper is so much easier!  The beds just fold out, the slide is a button.  No cranking it up!  We get all set up and then wonder if we forgot to do anything!  We did forget a few things, but nothing major (garbage can, dishcloth, hot pad, paper towels just to name a few).  Honestly though, we managed – plastic store bags make good garbage cans, a washcloth can work as a dishcloth and a hot pad, and we had plenty of hand towels, just nothing disposable.

We were very grateful for the air conditioning!  It was a typical Florida day – hot & humid!  We tried to get out early to do our bike riding and geocaching, but it warmed up pretty fast!  The bike trail was a lot harder than I anticipated – sandy & grassy (in my defense it started out as packed sand).  It was a three mile ride and the kids did awesome (even though my middle child was certain he wasn’t going to make it to the end of the trail).

Biking at Myakka River State Park Along the All Weather Trail

We enjoyed our new camper and are planning our next trip – also close to home just to be sure we really have everything.  Then we’re planning a couple longer trips.  What about you – do you camp?

Buying A Camper

Buying A Camper

Since we sold our camper, we’ve been looking for a slightly bigger one.  We didn’t want to buy a new tow vehicle, so we knew we’d have to find a lightweight one.  I’ve been stalking craigslist and a couple local RV sites.  I wasn’t sure I wanted to go the craigslist route (although that is how we sold our pop-up).  Before we sold our pop-up, we went looking at a local RV dealer just to see what was available.  Big mistake!  We found one we liked, but knew that we couldn’t afford it right then.  We were really just looking to see what was out there that would meet our needs.  It was hard to convince the salesman though.  We were a little gun shy after that!  I went back to stalking websites.  There was nothing!  I thought we wanted a bunkhouse preferably a single over a double (like the one we saw at the dealer).  We looked at a couple trailers at a local RV dealer, but they were a little too used!  So, I went back to craigslist and found one that looked so cool – it was trailer, but it had beds that popped-out from the sides.

Shamrock Back Beds

The kids’ beds (and our bike carrier).

A little more looking and I found a nice used one at a dealer.  On the website, it looked like it was at a dealer about 2 hours from us.  When I called to get more information, they said it was actually at a dealer near us…the first one we had been too and weren’t sure we wanted to go back.  This time around, we knew someone who worked there and so we went through him.  We asked lots of questions – how much does it weigh, are the brakes and tires good, how much cleaning did the dealership do (the camper was spotless – apparently they don’t clean them much so you get a feel for how the previous owner cared for it), how big are the water tanks, is there anyway we can take our bikes (turns out there is)?  We learned how to hook up a weight distributing hitch and sway bar.  We learned that the beds are held out by cables (I had to google how much weight they can hold – over 1,000lbs!).

Shamrock Front

This is the front bed.  I like that it’s away from the kids’ beds.  At night we can still use the dining room table and not disturb the kids.

Even though it’s a used camper and it’s 5 years old, it’s in excellent condition.  We can’t get over how much bigger it seems inside – there’s so much more room & storage (pictures coming in a future post)!

Shamrock Slide

The slide has our dining table and benches in it.


We’re looking forward to lots of camping adventures this summer!


How To Sew: Shortening 3/4 Sleeves

How to sew shorten sleeves

I’m working on a series of posts about adjusting clothing to fit.  To see all of them click here – How to Sew.

I’ve had this shirt for several years now.  I really like it, but I’ve only worn it a handful of times.  Why?  It has 3/4 length sleeves with a button cuff.  I’m not sure who thought that would be comfortable, but it isn’t!  The sleeve can’t slide up and down my arm.  No matter how I move my arm, the sleeve stays right there – half way between my elbow and my wrist.  It means the rest of the shirt pulls up whenever I reach.  I’m not into showing off my midriff and it’s just plain uncomfortable.  So, it mostly sits in my closet.  Why have I kept it?  Well, I do like the style & the print.  It’s also nice material with 3% spandex so it has a little give to it.

Button Up Shirt with 3/4 Length Sleeves

The other day, I wanted to wear it, but as soon as I put it on, I remembered why I don’t.

Button Cuff Doesn't Let Sleeve Slide

The sleeve can’t slide past my elbow. Very annoying!

Plus, now that I live in Florida, I don’t have much need for anything beyond short sleeves.  I’m not sure why I didn’t think of it sooner – I’ve shortened a lot of hubby’s dress shirt sleeves.  It’s so easy!

Cut the sleeve off at the desired length plus 1/2″ for the hem.Cut Sleeve Off

Using the cut-off as a pattern, cut the other sleeve to match.Cut Other Sleeve to Match

It looks better already!Sleeves Shortened

All they need is a quick hem.

Turn under 1/4" on the sleeve edge.

Turn under 1/4″ on the sleeve edge.


Turn under another 1/4" and sew in place.

Turn under another 1/4″ and sew in place.


Finished Sleeve

My new short sleeved shirt.

My new short sleeved shirt. (and yes, I purposely told my daughter to not get my face).

Don’t forget to take the buttons off the cuffs before you toss them.  You can never have too many extra buttons!

Everglades

Everglades National Park

Earlier this year, we took a long weekend trip to Key West.  Along the way, we stopped at two different areas (entrances) in the Everglades.  We weren’t sure what to expect.  By the time we got there the first day, it was late afternoon and we didn’t have much time to walk around.  Our boys weren’t happy – they wanted to explore more!  We promised that we would stop back in a couple days after we drove to Key West.

To get there, we drove across Florida on I75 aka Alligator Alley.  They were so many spots to pull off and look.  We took our time and enjoyed the drive.

Alligator Alley

Driving on the highway, you don’t see the canal.

The view from one of the pull-offs.

The view from one of the pull-offs.

I’m not sure what I expected, but it was definitely different!  There is just so much open space (it is 1.5 million acres!!)!  Our first day, we stopped at the Royal Palms entrance in Homestead.  We walked the Anhinga Trail and the Gumbo Limbo Trail.  Gumbo limbo trees are so awesome (and I have NO pictures of them)!  They would make an awesome (and totally natural) fence!

The birds along the Anhinga Trail are so used to people, that they don’t seem to notice.  They just go about their business like there’s no one around.

Heron at Everglades

Bird Everglades Royal Palm

We also drove partway to Flamingo, but the gas gauge was bordering on E (and I’m totally paranoid about running out of gas) so we turned around.  Later we realized that there’s a gas station when you get to Flamingo (oops…apparently my map reading skills need work).

There are some geocaches that we stopped for, but cell signal is very iffy!!

Road Into the Everglades

I love driving on roads like this! It’s like an adventure!

  Along the way we stopped at different walkways.

Walkway in the Everglades

We wanted to walk out to this pond, but recent rains meant it was pretty flooded.

Flooded Pond Everglades

We almost didn’t stop at Shark Valley.  People were parking along the road and it looked so SO crowded, but we decided to drive through the parking area and see if there were any open spots.  There was and we had a quick lunch before setting off to explore.  The trail is 15 miles round trip.  We were definitely not up for a long hike and we didn’t have our bikes with us (they do offer a tram for a price), but we just walked down the trail a bit.  There were alligators laying right along the trail!!

We saw a mama and her baby.

Alligator Mom Baby Shark Valley

Look how tiny her baby is!

Alligator in Shark Valley Everglades

We were so glad we stopped!  We’re planning to go back again when we have more time and the weather cools off.  Have you ever been to the Everglades?  What was your favorite place?

  • « Previous Page
  • 1
  • …
  • 14
  • 15
  • 16
  • 17
  • 18
  • …
  • 43
  • Next Page »

Hi, I'm Mona - wife, mom, teacher, seamstress, blogger. This is my home on the web. Read More…

Categories

Copyright © 2026 · The Marianne Theme By Blogelina · Built on the Genesis Framework

Copyright © 2026 · The Marianne on Genesis Framework · WordPress · Log in