SewMona

A slice of my Florida life

  • Sewing
    • SewMona on Etsy
    • Clothes
      • Boys
      • Girls
      • Men
      • Women
    • Pattern Reviews
    • How to Sew
  • Camping
    • Florida Campgrounds
  • Recipes
  • Crafts
  • DIY
  • About

Pattern Review – Tara Top by Made for Mermaids

*This post contains affiliate links.

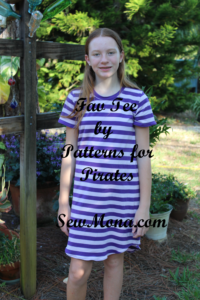
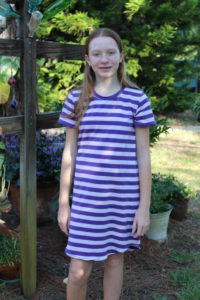
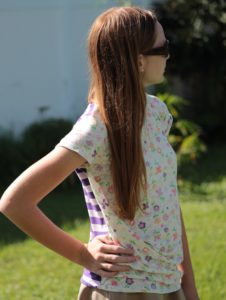
The new Tara Top by Made for Mermaids is another excellent pattern.  It’s full of options and will work for all four seasons!  Living in Florida, I only made the short sleeve version (I can’t convince her to wear tank tops).

Tara top by Made for Mermaids front view

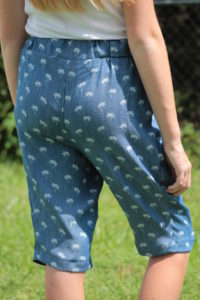
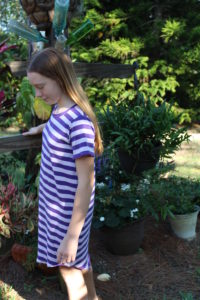
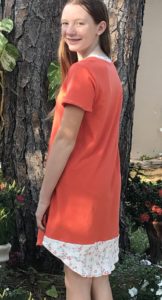
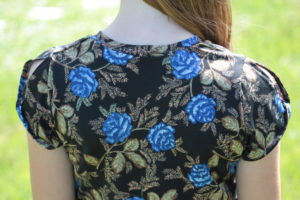
One of the unique features of this top is the twist on the side.  It’s perfect for those drapey knits!

Tara top by Made for Mermaids side view

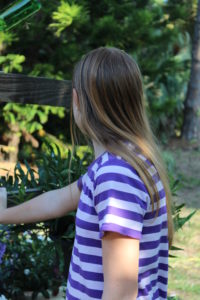
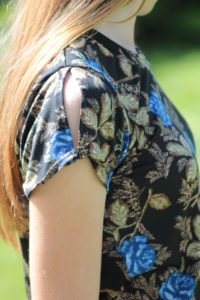
It just looks so breezy and cool!  This shirt has short sleeves with no twist – just regular short sleeves.

Tara top by Made for Mermaids size view no twist sleeve

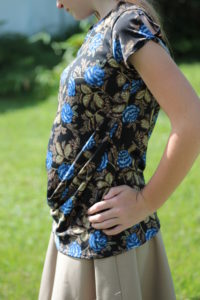
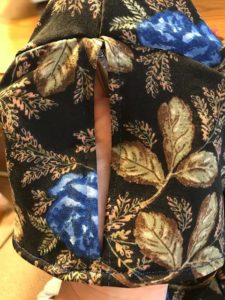
Another one of the unique features is this twist sleeve.

Tara top by Made for Mermaids twist sleeve close up

If you happen to forget to put the twist in when you attach it to the body, that’s OK – it still looks nice!  I did take the sleeve off and redo it since I really wanted the twist.

Tara sleeve without the twist

The pattern is $9 and there’s also a Mama Tara (also $9) so you can get both patterns and make Mommy & Me outfits.

*This post contains affiliate links.  See my disclosure policy for more details.

Pattern Review – Little Loungers by Patterns for Pirates

I recently tested the Little Loungers pattern from Patterns for Pirates.  I wasn’t sure about the pattern when I started.  I was having a hard time figuring out what fabric to use.  I didn’t want to make another pair of jean shorts.  For my first pair, I used some fabric I had on hand.  I figured if they didn’t turn out, it wouldn’t be much of a loss.  When they were done though, I loved them!  So did my daughter!

I think one of my favorite features is the button tab.  Mine doesn’t really button, it’s just for looks.

Little Loungers Button Tab

Please ignore the wrinkles – I ironed and steamed and ironed some more!

One thing I always look for, especially in girls patterns are pockets.  You can never have too many pockets!  For this pair I did patch pockets on the front and back.

The back pockets gave me such a hard time!  I put them on according to the directions (there are no placement lines, just suggested measurements from the center back seam and the waistband seam) and they were so crooked and not lined up!  I took them almost all the way off, had my long-suffering daughter try them on and pinned them where they should be.  They looked much better!

I did an elastic waistband, but you can also do a yoga waistband and add a drawstring to it.  I love the length of these – they’re long enough that they don’t feel like short shorts, but they’re short enough for Florida summer!

I also made a pair from this light weight denim look material (modal, maybe?).  These are the knee length version and she says they are very comfy and will be perfect for winter.

The legs taper in a bit below the hip so they look kinda funny when you hold them up, but they look great on!


Get the pattern here or get the Mama pattern Linen Loungers or even better, buy both patterns in a bundle and make matching outfits for you and your kids.  The patterns are on sale through Sunday midnight (central time).

Dyeing Polo Shirts

Dyeing Polo Shirts

I’ve had two light colored polo shirts that were stained, but I hated to throw them away because they were pretty new (as in they got stained on one of the first wearings).  I washed them, rewashed them, treated the stains, retreated the stains, washed them some more, but nothing worked.  So, they’ve been sitting on my sewing desk waiting for me to figure out what to do with them.  Then, I wondered about dyeing them.  I chose purple because it’s darker and I’m hoping that it will cover the stains.  For about $2, it’s a pretty cheap way to remake a shirt!

All you need is a box of dye and some shirts.

I opted to dye them in a bucket (an old kitty litter pail).  I filled it about half way with hot water and added some hose water.  Although the directions said to add 3 gallons, I didn’t measure.  The only thing I did measure was the hot water to mix the dye.

MixTheDye

AddTheDye

I heated water on the stove, soaked the shirts and then added the whole mix to the dye.

WetThePolos

When I dunked it in and then lifted it right back out I wasn’t sure I was going to like it.

AddPolosToDye

About 20 minutes later when I checked it and the color was so much better!

Checking the dye color.

After about 25 minutes, I was happy with the color.  I dumped my dye and then rinsed the shirts in clean water.  I kept rinsing until the water was clear.  Then I hung it over a chair to drip dry.  When it stopped dripping, I tossed it in the dryer…then I re-read the directions and saw that I was supposed to wash it first.  Oh well.  I’ll just wash it separately for the first couple times.

DryingDyedPolos

So, because I didn’t wash it right after I made it, I washed the dyed polo shirts with our towels.  I don’t care so much if the towels come out with a purple tint.  Although the the water did get a little purple, my towels were OK.  I’ll probably continue to wash them with towels until they don’t make the water purple though.  Better safe than sorry!

Washing a dyed shirt

The dye covered the stains pretty decently, but not the thread.

The dye didn't cover the stitching.

It did make slightly darker spots where the stains were, but I don’t think they’re very noticeable.  Definitely not as noticeable as the stains before I dyed the shirts.

Finished Dyed Shirt

Have you ever dyed anything?  Did it work out?

Pattern Review: Dax Trousers by Gracious Threads

Dax Trousers by Gracious Threads

*This post contains affiliate links.

I recently got to try our the new Dax Trousers by Gracious Threads.  I was a little nervous about it – a real, working fly?  Double welt pockets?  Yikes!  The only thing I skipped was the belt loops.  This pattern taught me a lot!  I’ve never done an actual fly before.  I always thought it was hard – isn’t that what you’re always told?!  Turns out, it really isn’t that bad!  The instructions with the pattern were great, but if you need more help, there’s a free guide that you can download too (link is in the pattern).  It includes more pictures plus instructions on shortening zippers.

Dax Trousers by Gracious Threads with fly closed.

I still need a little practice, but I’m so happy with how it turned out!  The best part is that it really does work!

Dax Trousers by Gracious Threads with fly open.


I’ve also never done welt pockets.  Mostly because I’m scared of them.  Also, they involve cutting a slit into your material – in the middle…if you mess up…..what to do??  Well, in reality, they weren’t that bad!  The directions walk you through each step plus there’s a link to a video walking you through the process. I made the whole pocket out of a contrasting material to add some detail to the shorts.  If you just do the lining from a different material, you won’t see it on the outside.  I’m so happy with how these turned out!  Two new skills in one pattern!  That’s a win!

Welt Pockets Dax Trousers by Gracious Threads

The pattern is actually for pants but since we’re in Florida, I cut them off to make shorts instead.  I measured the inseam of a pair of shorts that currently fit and used that as a starting point for the length of these.  I love the how nice the finishing touches (mostly the top stitching) make them look – almost like they were store bought.  If you are on good terms with your twin needle, these would look sharp with two rows of top stitching.

I even made a second pair and they turned out equally nice (and it didn’t take me as long to make them!).

Dax Trousers by Gracious Threads

This pattern is currently available through One Thimble or as a stand alone pattern.  While I went with jean material, this pattern could also be used to make slightly dressier pants.

Dax Trousers by Gracious Threads

Go check it out and then let me know what you’re planning to make.  Have you ever done a real fly or welt pockets?

*This post contains affiliate links.  See my disclosure policy for more details.

Pattern Review – Fav Tee by Patterns for Pirates

Fav Tee by Patterns for Pirates

*This post contains affiliate links.

I recently tested the new Fav Tee by Patterns for Pirates.  As with all her patterns, there are tons of options and the directions are excellent!  I chose to make a short sleeve dress length shirt with a rounded neckline.  I also added about 2 inches to the length of the striped dress.  When I made the color blocked one, I felt like it was just a little too short to wear alone.
Sleeve view of Fav Tee by Patterns for Pirates

This shirt dress went together super quick!

Front view of Fav Tee by Patterns for Pirates

This dress has quickly become a favorite for throwing on when she needs to change quickly.

Fav Tee by Patterns for Pirates

There are so many other options – v-neck, long sleeves, 3/4 sleeves, tunic length with side vent, or shirt length with knot hem.

Side view of Fav Tee by Patterns for Pirates

I had this orange color that I loved, but it wasn’t quite long enough for the back hem.  I color blocked the bottom and used the same material for the neckline.  I love the way it came out!  Color blocking is super easy!  When I cut the print piece, I added an inch to the top (the straight edge) for the seam allowance (1/2″).  After sewing the two back pieces together, I followed the directions for the dress.

Fav Tee by Patterns for Pirates

Buy the Fav Tee and check out the Mama Favorite Tee and a Favorite bundle.  Buy your favorite (get it??) and then come back and tell me what you made.

*This post contains affiliate links.  See my disclosure policy for more details.

  • « Previous Page
  • 1
  • 2
  • 3
  • 4
  • …
  • 8
  • Next Page »

Hi, I'm Mona - wife, mom, teacher, seamstress, blogger. This is my home on the web. Read More…

Categories

Copyright © 2026 · The Marianne Theme By Blogelina · Built on the Genesis Framework

Copyright © 2026 · The Marianne on Genesis Framework · WordPress · Log in