SewMona

A slice of my Florida life

  • Sewing
    • SewMona on Etsy
    • Clothes
      • Boys
      • Girls
      • Men
      • Women
    • Pattern Reviews
    • How to Sew
  • Camping
    • Florida Campgrounds
  • Recipes
  • Crafts
  • DIY
  • About

How To Sew – Making A Dolman Plus Get A Free Pattern

*This post contains affiliate links.

MotherDaughterDolmans

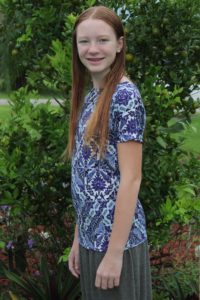
I was so excited because I really wanted to do a dolman style shirt for the next easy pattern and I recently discovered a free one!  You have to join the Facebook group to get the code for it.   The wide range of sizes (00-26) is another reason I like this pattern – I can make shirts for my daughter and me from the same pattern.  She’s a teenager and sometimes she fits kids sizes and sometimes she doesn’t.

Dolman Slim Fit

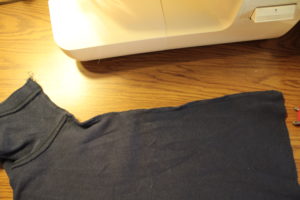
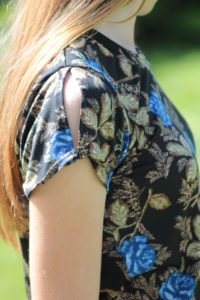
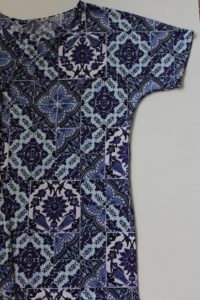
Dolmans are really easy because there are no sleeves to sew in since they are part of the body (although there are options to add long sleeves to it).  Two seams, a neck band, sleeve hems, and the bottom hem.  This pattern is also for knits so you’ll need a ball point needle.  Either a size 14 or 11 (The thinner the material the smaller needle number).

Halla Slim Fit Dolman

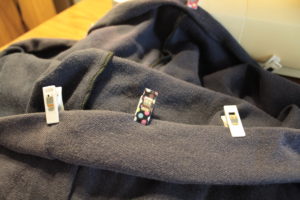
I decided to have my daughter make one of these with me – just to show how easy it is.  Her least favorite part is pinning and cutting and yes, we’re on the floor…not ideal, but it works in a pinch.

Learning to cut out a pattern

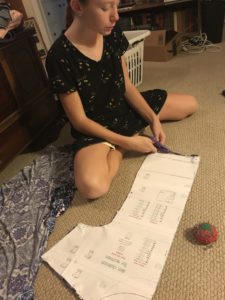
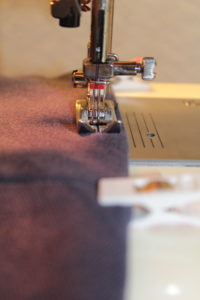
Just to keep things real – she didn’t actually get to sew her shirt.  My machine was giving her fits – skipping stitches.  It turned out that I was using the wrong size needle and then the needle was bent just the slightest bit.  By the time I realized that, she was done.  Since I don’t want to force her to sew, I finished up her shirt.

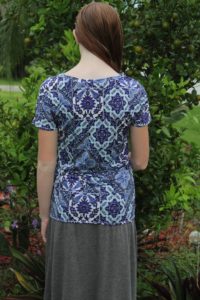
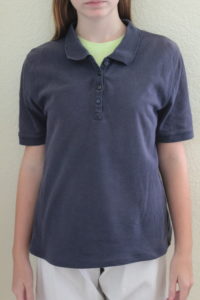
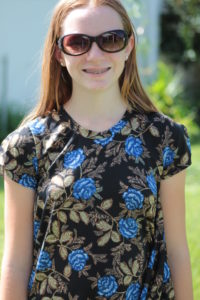
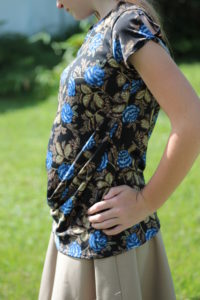
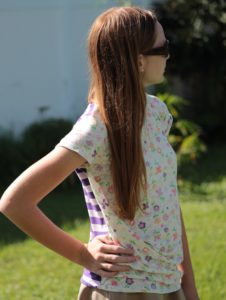
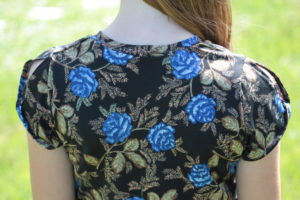
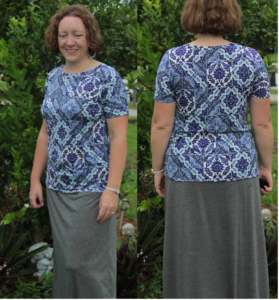
Even though this pattern is free, there are still options!  Don’t like the slim fit?  You can make it less fitted.  Want bat wing style sleeves?  You can do that too.  The best part is, these are techniques that you can use to alter other patterns you have.  There are two neckline options.  For my daughter, I did the higher neckline and for mine, I went with the lower neckline – still perfectly modest, just not as high.  I tried on the shirt before I put the neckband on and was concerned that the neck was going to be too big.  Never fear, once the neckband was on, it fit perfectly!

Halla Slim Fit Dolman Front and Back

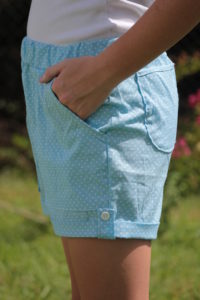
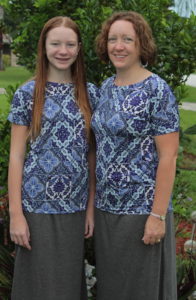
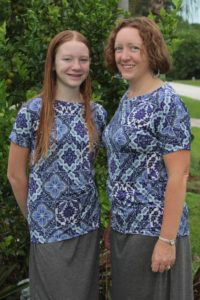
The dolman pairs perfectly with the Chloe maxi skirt (also free and super easy) from Made for Mermaids (which is what we’re wearing in our matching pictures).  I’m sure that at some point in the future, my teenager won’t want to match me, but for now she loves it.

Halla Slim Fit Dolman and Made for Mermaids Chloe

The Hallå Slim Fit Dolman is available for women in sizes 00-26.  Join their facebook group to get the code to get it free (read the pinned post).


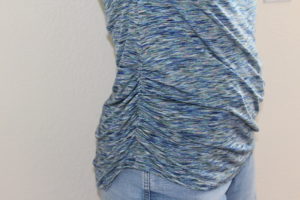
Another option for a dolman pattern is the Sun Kissed Tee dolman by Peek-a-Boo Pattern Shop.  It is NOT free, however she does have sales on occasion.  It’s a simple no frills pattern, but there’s an option to add ruching to the sides which is why I love the pattern!  I think the ruching adds a nice touch and it’s really not that hard.  There are others with more sleeve and hem options, but for beginners, I really like these two.

Dolman shirt with ruched sides.

*This post contains affiliate links.  See my disclosure policy for more details.

How to Sew – Making A Polo Shirt Smaller

The private school where I teach (along with DH and our kids also attend) requires us to wear polo shirts.  Polos are one thing I’ve never tried making.  I buy the $5 ones at Old Navy during our tax free weekend.  Occasionally I find them at a thrift store for less than $5.  Last year, I managed to get a hole in my navy blue polo.  It was still in really good shape otherwise.  I hated to throw it away!

Navy blue polo with a hole near the hem

It really is a little hole and lucky for me (and my daughter), it’s below where the hem needs to be for her.

Navy blue polo with a hole near the hem.

So, I just trimmed it off.  Ignore my horrible cutting…I just eyeballed it and clearly didn’t do a very good job.  Hemming will fix that!

Trim the hem off the polo

I also took the side seams in a bit so it wasn’t quite so baggy on her.

PoloSideSeam

Turn up the hem – I turn under 1/4″ and then another 3/4″ so the hem looks neat and you don’t see any unfinished edges.

PoloHemClipped

Hem the shirt with a double needle for a professional finished look.  Make sure to hem with the right side up if you’re using a double needle.  Also, this is one of the many reasons I love these clips – it doesn’t matter which way I put them on, I can sew with either side up.  With pins, you have to sew with the side you pined facing up.

Hem the polo with a double needle for a professional finished look

The finished product – a pretty good fit for my teenager and there are no holes in it!

Pattern Review – Tara Top by Made for Mermaids

*This post contains affiliate links.

The new Tara Top by Made for Mermaids is another excellent pattern.  It’s full of options and will work for all four seasons!  Living in Florida, I only made the short sleeve version (I can’t convince her to wear tank tops).

Tara top by Made for Mermaids front view

One of the unique features of this top is the twist on the side.  It’s perfect for those drapey knits!

Tara top by Made for Mermaids side view

It just looks so breezy and cool!  This shirt has short sleeves with no twist – just regular short sleeves.

Tara top by Made for Mermaids size view no twist sleeve

Another one of the unique features is this twist sleeve.

Tara top by Made for Mermaids twist sleeve close up

If you happen to forget to put the twist in when you attach it to the body, that’s OK – it still looks nice!  I did take the sleeve off and redo it since I really wanted the twist.

Tara sleeve without the twist

The pattern is $9 and there’s also a Mama Tara (also $9) so you can get both patterns and make Mommy & Me outfits.

*This post contains affiliate links.  See my disclosure policy for more details.

Pattern Review – Little Loungers by Patterns for Pirates

I recently tested the Little Loungers pattern from Patterns for Pirates.  I wasn’t sure about the pattern when I started.  I was having a hard time figuring out what fabric to use.  I didn’t want to make another pair of jean shorts.  For my first pair, I used some fabric I had on hand.  I figured if they didn’t turn out, it wouldn’t be much of a loss.  When they were done though, I loved them!  So did my daughter!

I think one of my favorite features is the button tab.  Mine doesn’t really button, it’s just for looks.

Little Loungers Button Tab

Please ignore the wrinkles – I ironed and steamed and ironed some more!

One thing I always look for, especially in girls patterns are pockets.  You can never have too many pockets!  For this pair I did patch pockets on the front and back.

The back pockets gave me such a hard time!  I put them on according to the directions (there are no placement lines, just suggested measurements from the center back seam and the waistband seam) and they were so crooked and not lined up!  I took them almost all the way off, had my long-suffering daughter try them on and pinned them where they should be.  They looked much better!

I did an elastic waistband, but you can also do a yoga waistband and add a drawstring to it.  I love the length of these – they’re long enough that they don’t feel like short shorts, but they’re short enough for Florida summer!

I also made a pair from this light weight denim look material (modal, maybe?).  These are the knee length version and she says they are very comfy and will be perfect for winter.

The legs taper in a bit below the hip so they look kinda funny when you hold them up, but they look great on!


Get the pattern here or get the Mama pattern Linen Loungers or even better, buy both patterns in a bundle and make matching outfits for you and your kids.  The patterns are on sale through Sunday midnight (central time).

Pattern Review: Camila Swimsuit by Made for Mermaids Plus Two Simple Hacks

*Some links are affiliate links.

I recently tested the Camila swimsuit by Made for Mermaids.  It was my first venture into girls swimwear.  I’ve made swimsuits for my boys and they’ve worked out really well.

These Monaco swim trunks are so comfy for my boys!  They’re made from swim knit  are so much easier to move in, plus there’s so many more options for fabric!  The shark shirt is one I drafted myself based on a shirt that currently fits.  The turtle shirt is the Boulder Tee by Gracious Threads.

Back to girls swimsuits – I’ve never made one!  I’ve thought about it, but never took the plunge.  The Camila is an easy swimsuit and it comes with a couple options.  For my first one, I did view B (ruffle under the arm) with halter ties.

Camila Swimsuit Ruffle Halter Tie

A very simple, but nice touch was the ruching on the sides.  It’s so easy and looks so professional.

The acid test was jumping in and horsing around with her brothers.

It survived!


There were a couple small problems.  I felt like I couldn’t tie it tight enough to keep the suit up but not be too tight around her neck.  Also, there was a lot of extra fabric in the back.  I decided that it was because there was nothing to hold the back up, so it just kinda sagged down.  The elastic in the top was pretty loose too – in hind sight I should’ve measured the elastic around her before I sewed it to the swimsuit which would’ve helped with the sag.

Note the sag at the top of the back and the saggy butt look. Both of which we want to avoid!

Since I didn’t want to have a date with my seam ripper and rip the whole elastic piece out, I opted for the simpler solution – cross the straps and attach them in the back.  I had her try on the bathing suit and shortened the straps enough so they pulled the back up, but were still loose enough to get the swim suit on and off.  Presto!  Perfecto!

Criss Cross Straps Camila Swimsuit

What my daughter really wanted though was to have the ruffle on her shoulder.  View A has an off-the-shoulder ruffle with shoulder ties, but there isn’t enough room to pull the ruffle up on the shoulders.  So, I used the ruffle from the Daphne top & dress.  I attached it just like you would normally for View A, but the part of the ruffle not attached was much longer.  I used the elastic measurement from Daphne and attached it like Camila.  The result was perfect!

Sewing swim suits is not hard!  You need to take your time, make sure you have the right kind of needle (ball point), and remember pins or clips are your best friend!  Take the plunge!

*This post contains affiliate links.  For more information, see my disclosure policy.

  • « Previous Page
  • 1
  • …
  • 4
  • 5
  • 6
  • 7
  • 8
  • 9
  • Next Page »

Hi, I'm Mona - wife, mom, teacher, seamstress, blogger. This is my home on the web. Read More…

Categories

Copyright © 2026 · The Marianne Theme By Blogelina · Built on the Genesis Framework

Copyright © 2026 · The Marianne on Genesis Framework · WordPress · Log in